Find out how to make this stunning but simple gift.
Marker
All I do is craft, craft, craft...
Drawing, Watercolor, Coloring, Color, Cards, Crafts, How to, Hand Lettering, Paper crafting, Thrift, SuppliesCommentNot really, but I wish that were true! I have been trying to up my crafting game and it's resulted in some purchases of supplies and then actively using them. I try to make sure that I use my supplies regularly and I haven't bought new supplies (besides adhesive) in a few weeks. That might not sound spectacular, but for me that's a long time. The truth is I realized I have enough supplies right now to go "shopping" in my craft studio; that realization forces me to use/rediscover what I already own. Doing this has yielded some "Responsible Crafting". I'm using that to refer to things like making swatches:

Zig Clean Color Real Brush Pens
Practicing my handlettering:

Done with Tombow Dual Brushpens
And even working on my digital art:

Wacom Pad using Sketchbook
I've been working to really get the most out of my supplies and I have to say I'm pretty happy. I feel like I have fallen in love with some of my supplies all over again, which I like because I think it's easy to fall into the trap of "hoarding" supplies and being afraid to use your "good" supplies. To be honest, the whole reason you buy things should be so you can use them. I'm trying to take my own advice there, happy crafting!
The Daily Marker 30 Day
Diy, Crafts, Supplies, Tutorial, Color, Paper crafting, How to, Coloring, Stamps, Cards, Graphic, Watercolor, DrawingCommentI have been continuing through the challenge and here are this week's updates.

My first spinner card
This was created by using some patterned paper, my nesting circle dies, a hello die, and a Stampin' Up stamp. I colored the image using Copics and then drew a "back" of the image with a Copic Multiliner.

A window card
I made this card with a coordinating Stamp and Die set from Stampin' Up. I used a piece of acetate for "glass" in the window, I colored the images in Copics and did the background with Distress Ink.
Tomorrow I will be featuring the Chiffon Collection from QuickQoutes, I'll be showing how to make a Box Card. Happy Crafting!
The Daily Marker 30 Day - All of the Brush Pens
Paper crafting, Drawing, Coloring, How to, Supplies, Graphic design, Stamps, Graphic, Color, Hand Lettering, Watercolor, Crafts, Diy, ToolsCommentI have been coloring quite a bit and working on my hand lettering. This week I crammed in several projects for the challenge, so I am listing them at once, rather than posting daily.

Tombow ink blending on Bristol paper with white gel pen accents, and gold metallic marker accents.

More Tombow on Bristol and some more ink blending.

This was done with Zig Clean Color Brush Pens on Drawing Paper

Also Zig Clean Color on card stock. Background is Distress Ink.

Zig Clean Color on shimmer card stock.
I did several pieces this week, and tried a few different tools. I have to say I loved the Kuretake brush pens right out of the box, fro drawing, coloring, and handlettering. They proved to be extremely versatile and easy to use, I wish I'd ordered them sooner! Next week I will have a post with a tutorial video showcasing some of the 2016 QuickQuotes PowderPuff Chalking Inks, until then, happy crafting!
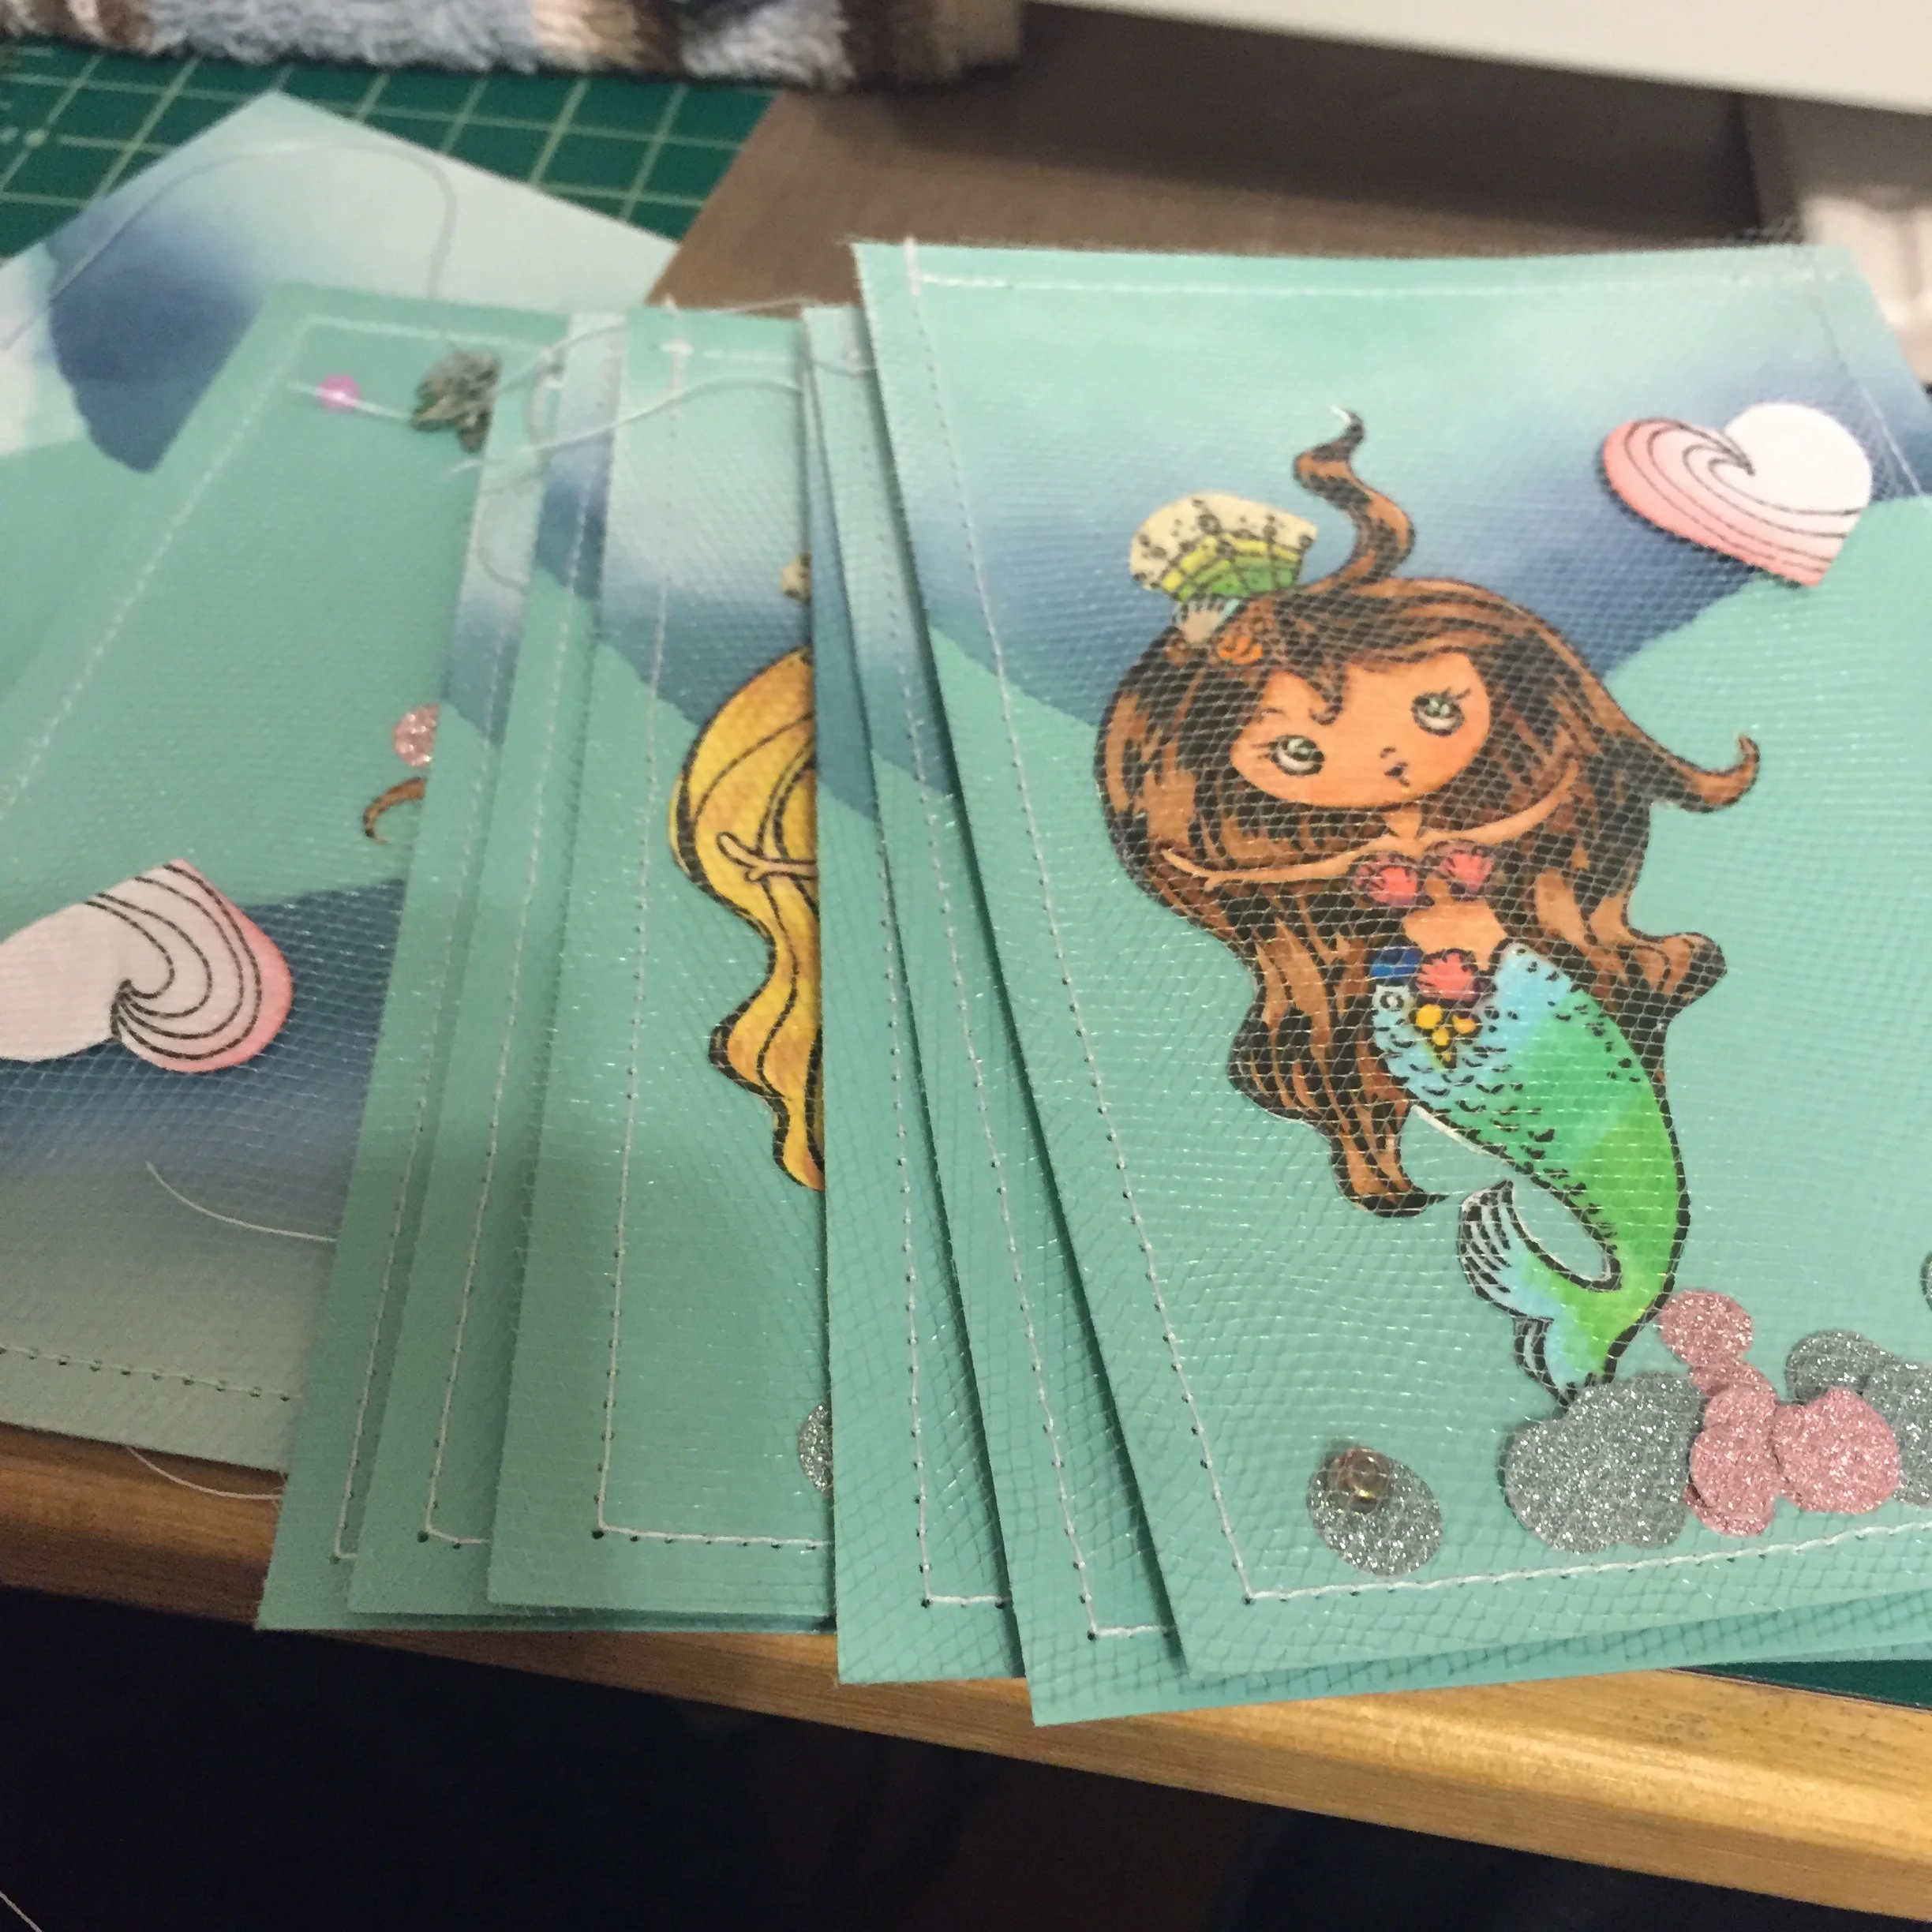
Tulle Shaker Mermaid Cards
Supplies, Stamps, How to, Tools, Crafts, Diy, Color, Cards, Graphic, Coloring, Paper craftingCommentSo I have been working on the Daily Marker 30 Day challenge and I have spent about 5 days on these, but I am so happy with the result.

All boxed up.
I started by stamping all of my mermaids and coloring them, and then fussy cut them all.

A school of mermaids.
Then I did some distress ink backgrounds to resemble water and then sewed tulle around the edge to make shaker pockets.

I sewed circles on to make pockets.
Then I used my We R Memory Keepers DIY Confetti Punch to make "Bubbles" out of glitter paper and trimmed down the tulle.
Almost done.
Finally I sewed up the tops and attached them to A2 sized note cards.

Done.
I boxed them up with envelopes to complete the set and shipped them to a friend.

I hope you try some new ways to make shaker cards and you have the chance to send someone happy mail! Happy crafting!