I am guest posting on the CardMaker blog today, doing a pop-up card using the Meet The Jelly Friends - My Jam Stamp set.
Balloons for a Craft Show
Gab with Gaby Stamps, Balloons, Craft Shows, Crafts, DecorCommentHi everyone! Gaby here with some real talk about balloon decor. First let me start by saying I have never done balloon art or balloon sculptures in my life...until last Sunday. I decided to add balloons to my setup for the craft show, so I started watching a few YouTube videos...and this happened!

I had so much fun making that, I made this:

And this:

And finally, this:

That was all in the span of a few days, but I really enjoyed it. I am still working out my booth decorations, but rest assured there will be balloons! Happy crafting!
-Gaby
Preparing for a Craft Show
Crafts, Diy, Gab with Gaby Stamps, Hand Lettering, Craft ShowsCommentHi everyone! So I finally did it...I booked a craft show. I have never done one before, but I have visited many, so I at least sort of know what I'm getting into. I have been reading articles and it's amazing how many little things I overlooked when I was thinking of what I would need to bring. Like change, a receipt book, and bags for customers! Now I am aware of those things and I have started building my booth/display and I'm sure I will learn a lot more in that process. I will be documenting the process in posts here and I have put up the info here. I will be updating that page as I do more shows/events. I decided to go with grids for my items because it would allow everything to be displayed.

Cards on display!
I also made some blankets for this show, so I tested out hanging those as well.

I'll probably need to get some new hangers, haha.
Of course I'll be selling Gab with Gaby stamps too and a certain pin.

Had to zoom in here!
I am still working on a small card display for boxed sets of cards, but I think I have a solution, I'll post that once I check it out. In the meantime, I am organizing and recording inventory to make sure that I have enough stock, but not too much! I am creating3 prints for this show based on my hand lettering/drawing and I have to work out that display too.

Design number one.
I also need to make signs and decorations, so it looks like I still have a ton of work to do! I cannot wait until this show, I feel like I will learn a lot and have a lot of fun. Until next time, happy crafting!
Hand Lettering is Amazing.
Drawing, Paper crafting, Graphic design, The Gab with Gaby Shop, Diy, Die Cutting, iPad Pro, Crafts, Shop Updates, Hand LetteringCommentHi there everyone. I have been working hard on my hand lettering and was able to make a piece of framed wall art that says "But first, Coffee!". I did this lettering on my iPad and then made a cut file that I sent to my Cricut as a "Print & Cut" file. Once it was cut out, I added some stamped images and adhered the letters and put everything in a jazzy frame.
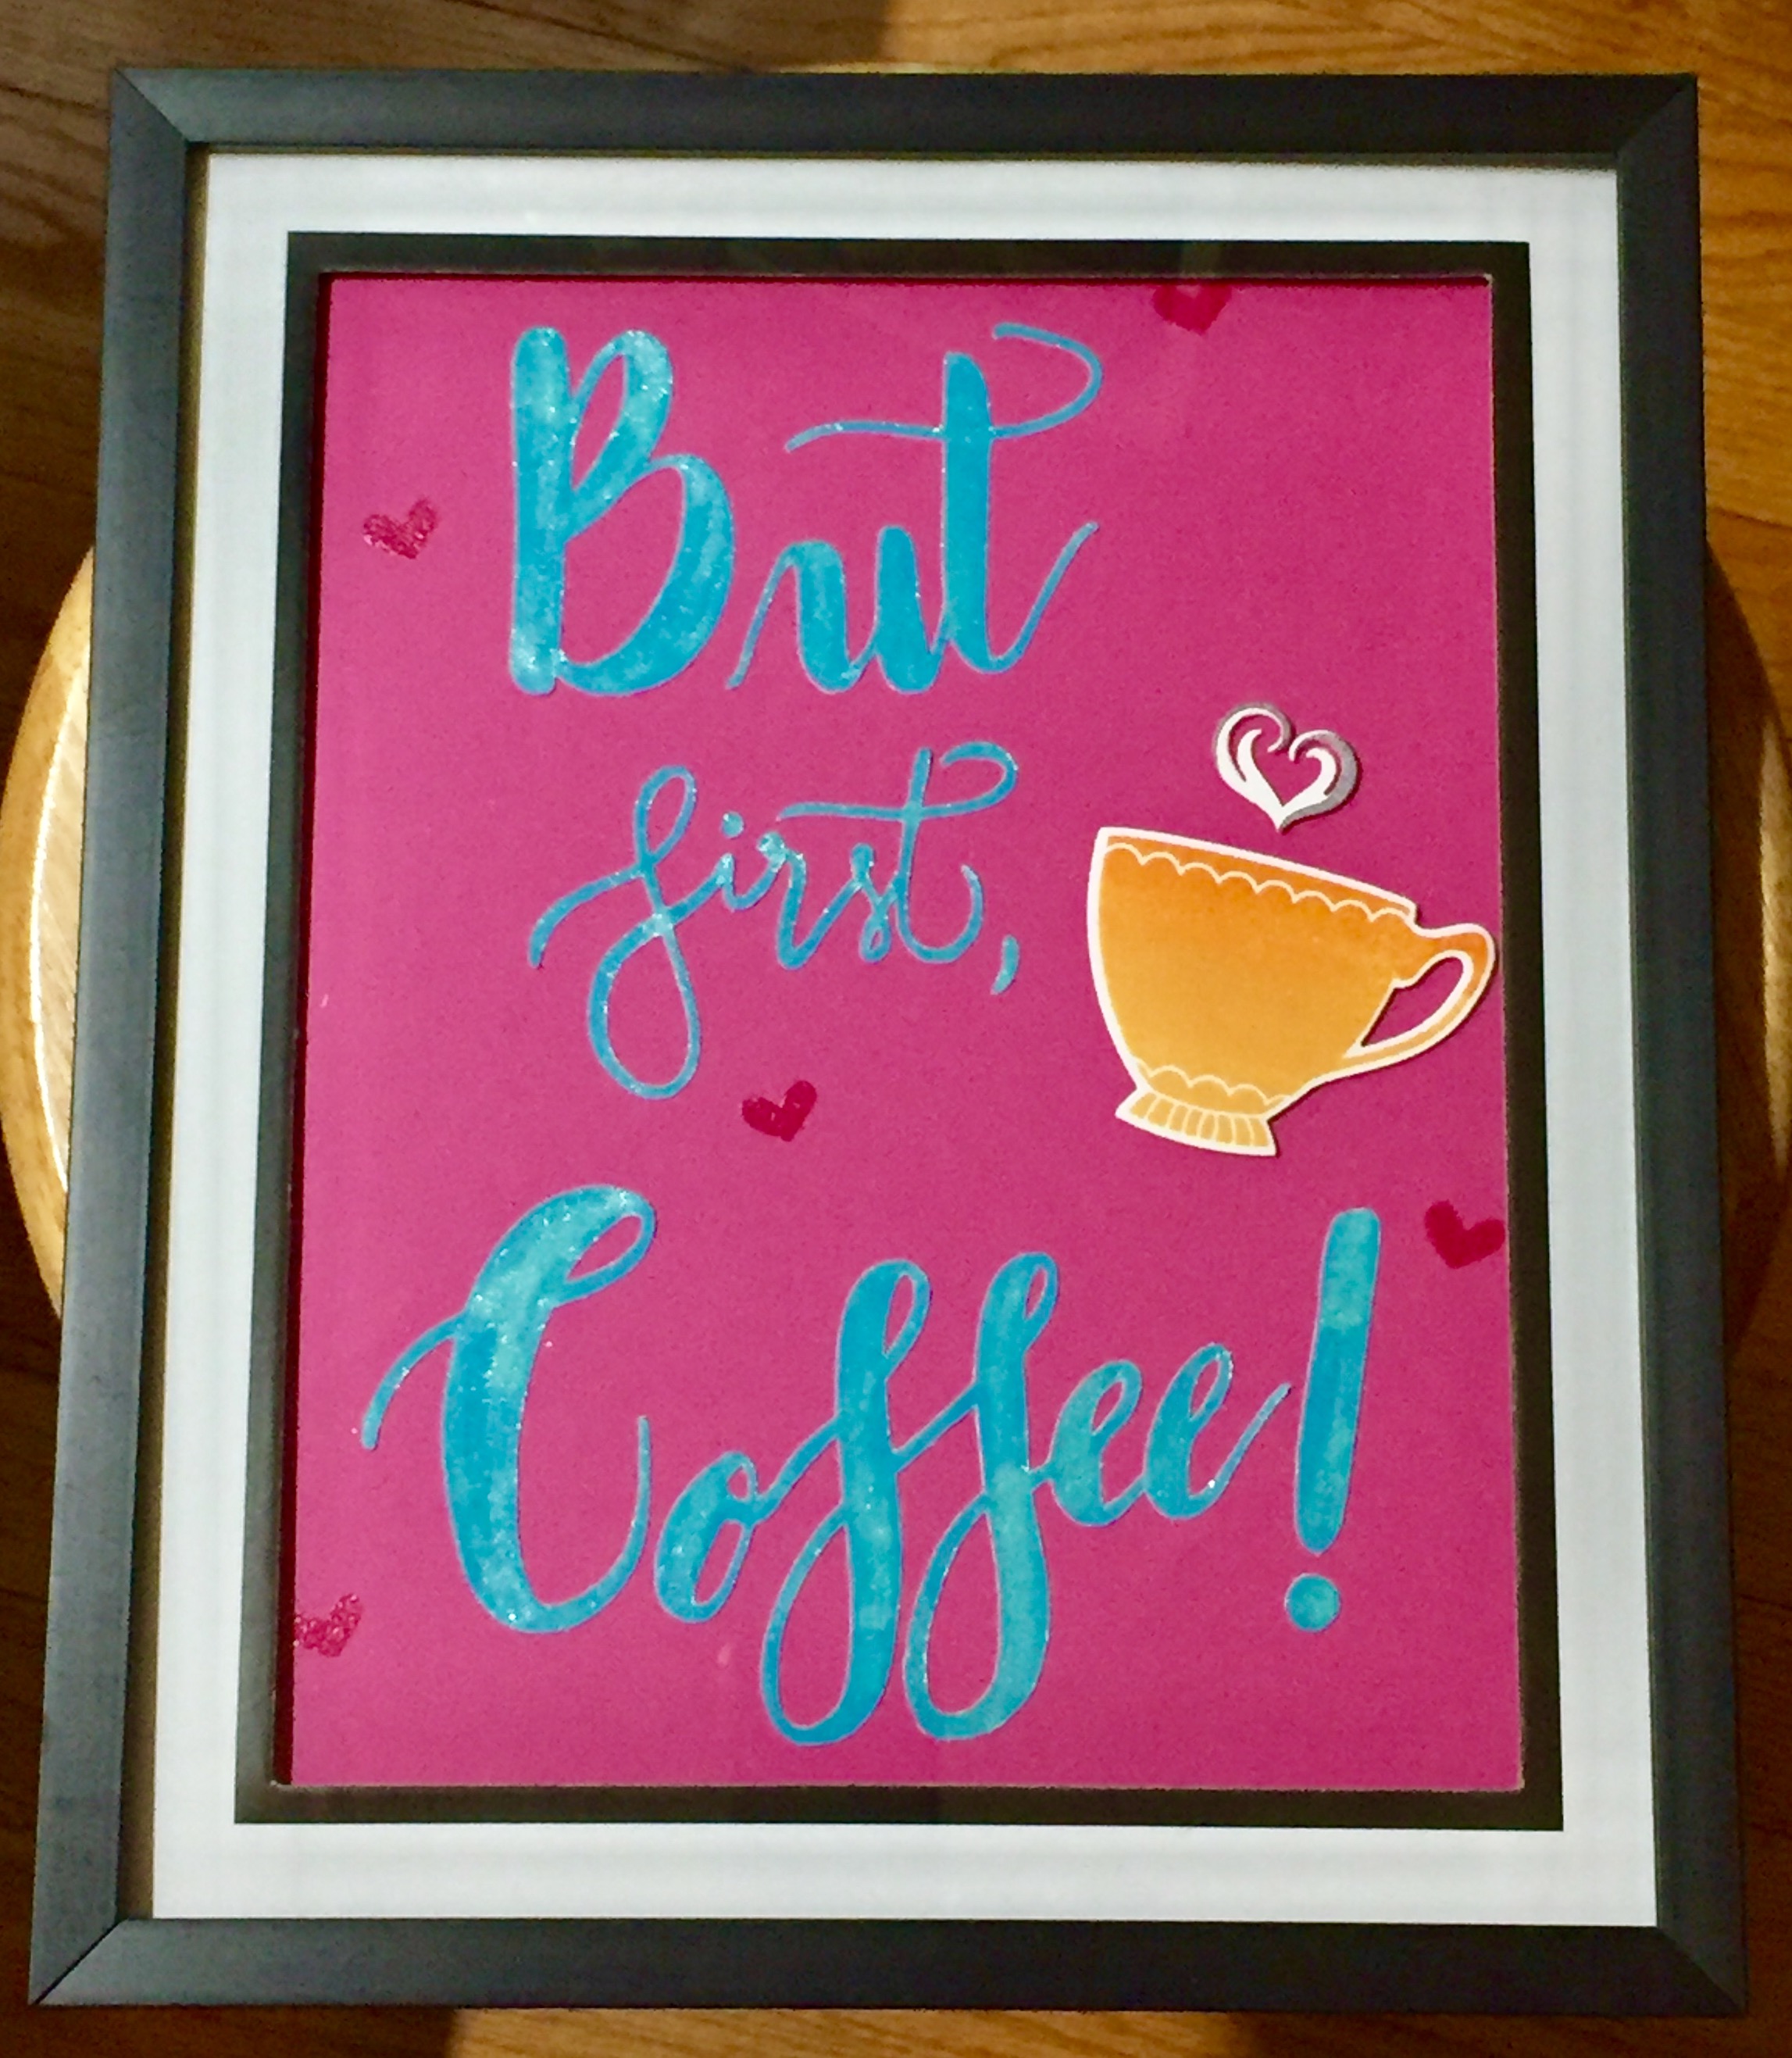
I will be making more of these and posting them in the shop; once I figure out how to upload cut files, I will have some free downloads for you too! That's all for today, but you can always check me out on IG by clicking on that slideshow on the right, happy crafting!
-Gaby
Scatter Kindness Card
How to, Watercolor, Cards, ColoringCommentHi there, it's Gaby and today's tutorial is about making a background with markers and embossing powder. I will be showing how to make the card below; it may look complex, but it's easy to do.

This uses lots of heat embossing.
I started by creating my background and used Bristol paper because I wanted to use my Tombow markers to "watercolor". The Bristol paper is cut to 4-1/4x 5-1/2.

I love seeing all the colors!
I used a Winnie & Walter "Kindness" stamp set and some Versamark ink to stamp multiple leaves to create my background.

Such a unique stamp set with great sentiments.
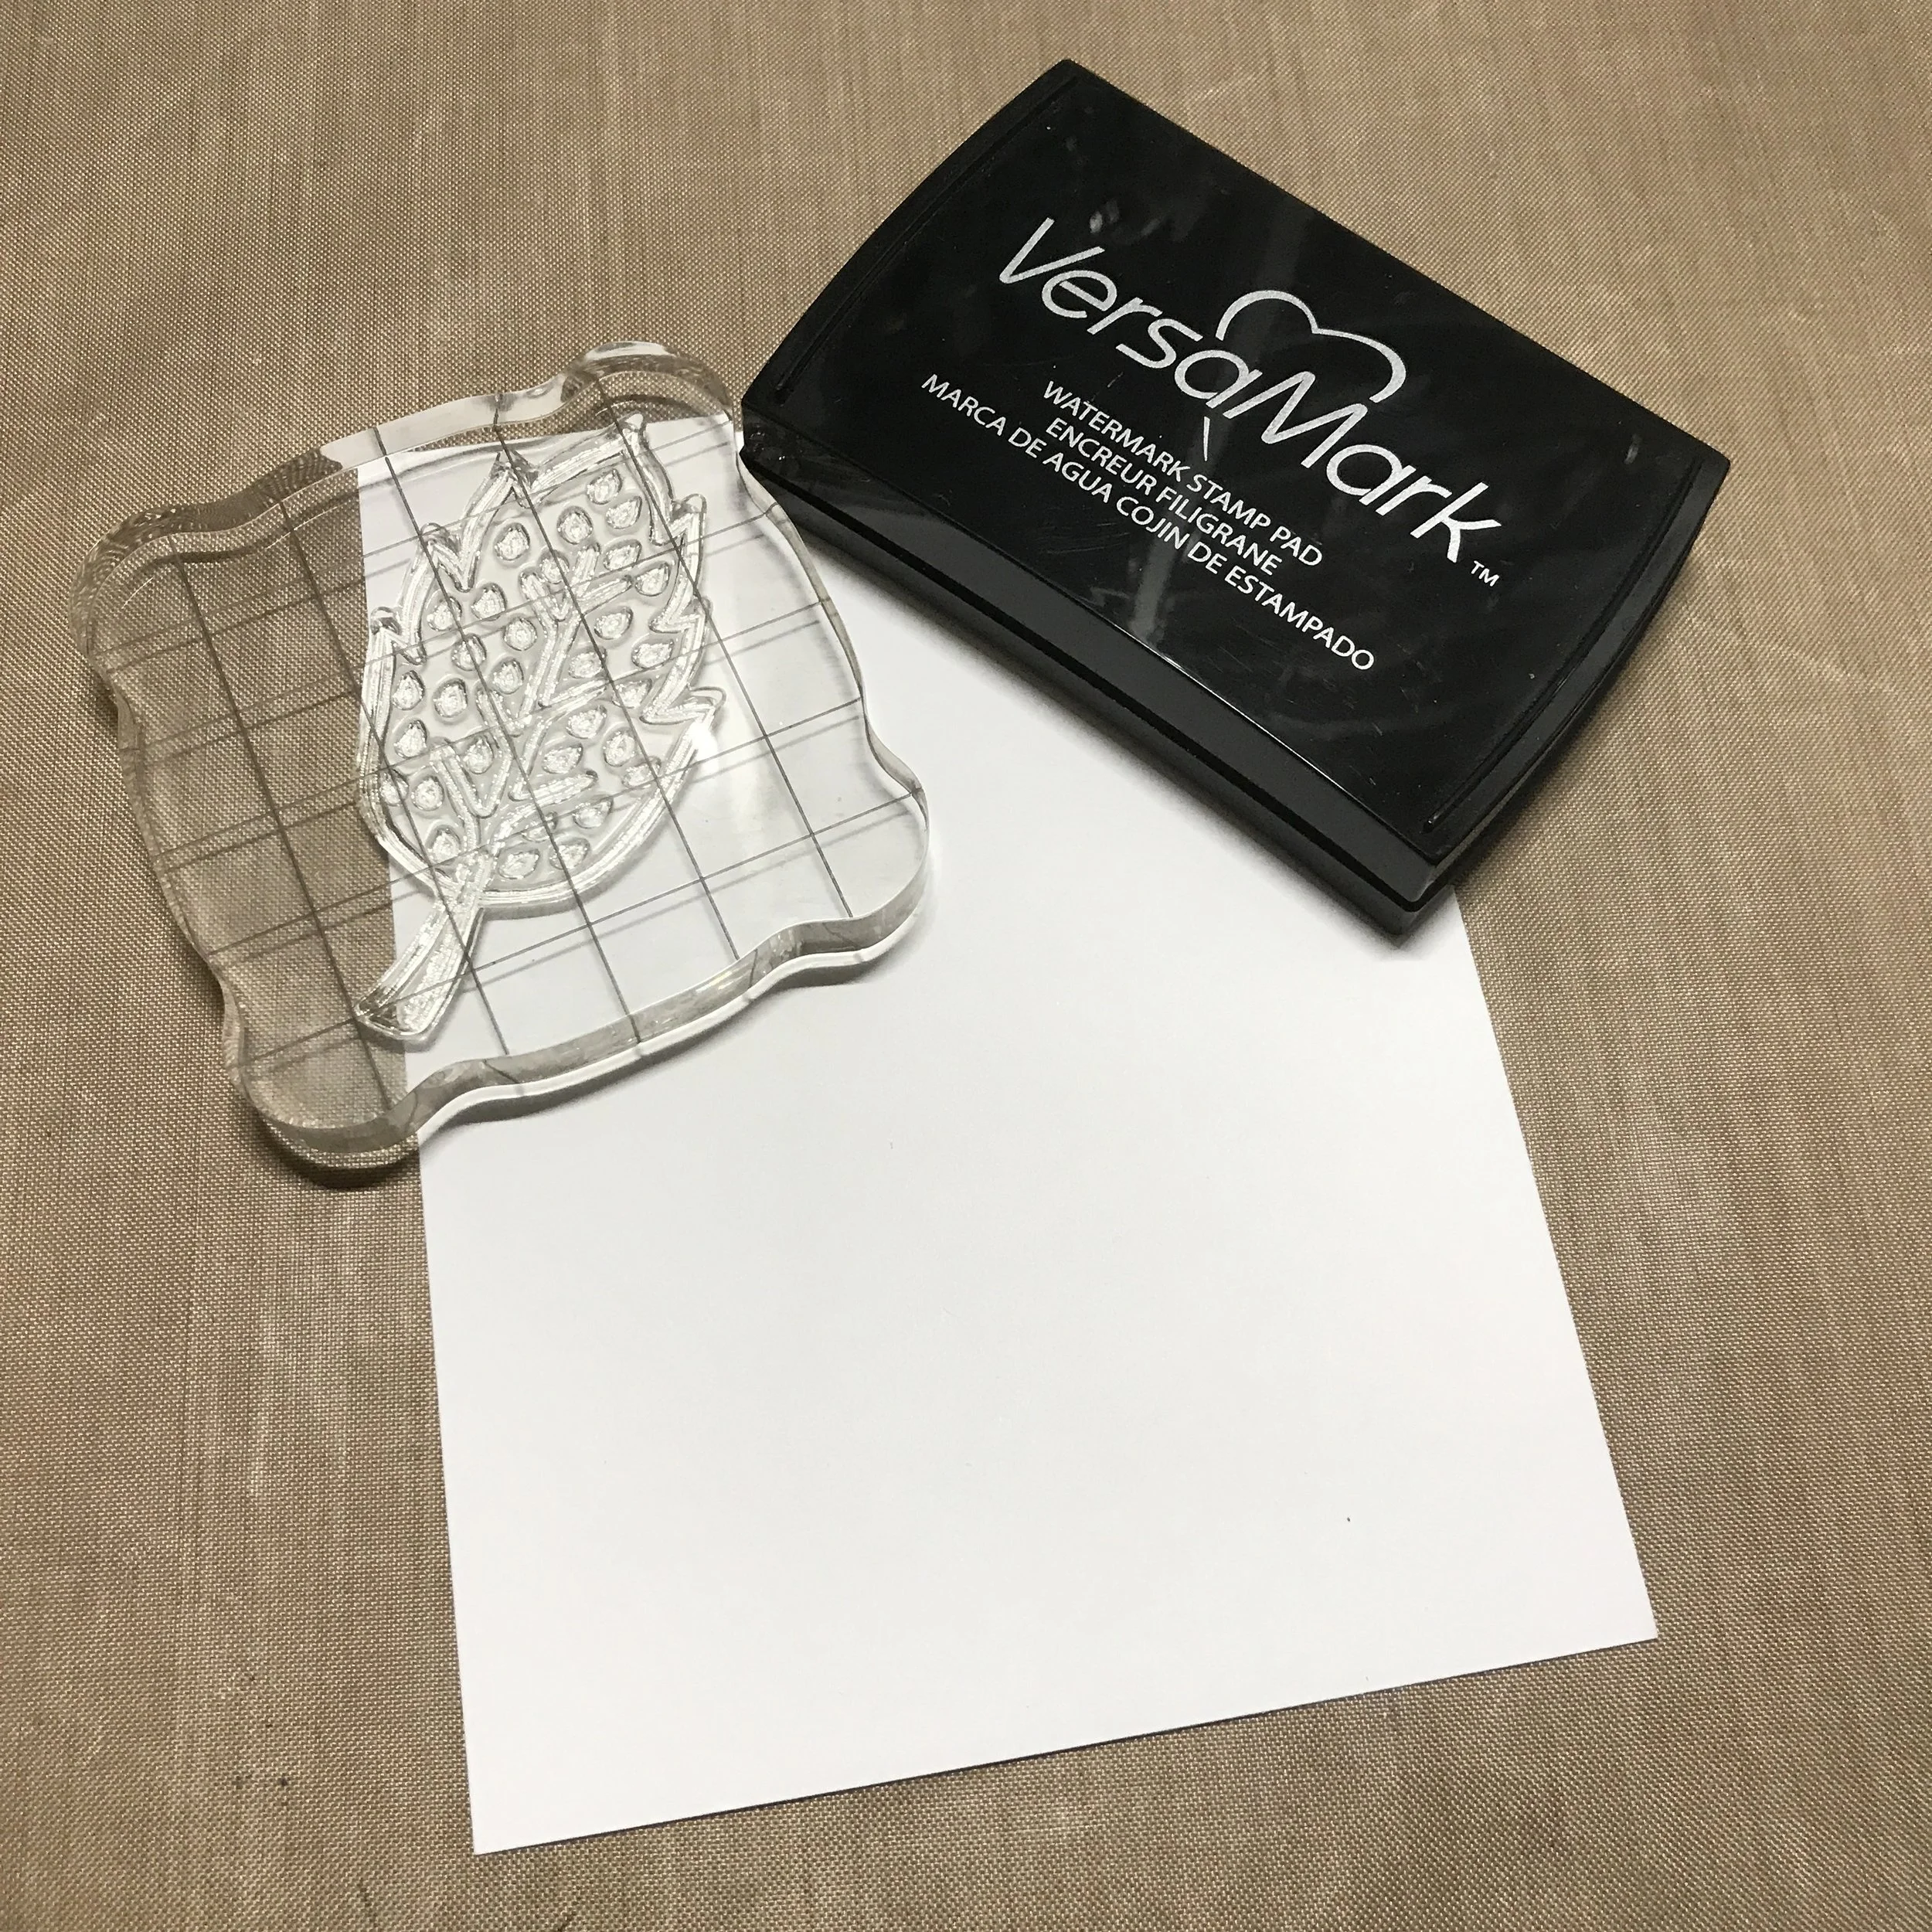

Then I used white embossing powder on the paper and heat set it.

I catch the powder in a coffee filter to put it back in the jar.


Next I added some color with my markers and just put them in different areas and used a water brush to blend them.


Once I added a little pink and blended it all, I grabbed some metallic gold to add splatters.

I used an acrylic block as a "palette".
Then I stamped the sentiment in gold embossing powder on vellum.

I heat set it and cut it into a banner shape. I used a Tombow glue pen to trace behind the embossing so the glue would be invisible from the front.

I weight the vellum down with some acrylic blocks to let the glue dry.

Finally, I taped the card front to a top folding notecard.

That's it, you're done! I hope this post was helpful and that you have a chance to try some of these techniques. Happy crafting!
-Gaby