Gab with Gaby

An engineer's creative corner studio.

project ideas

Meta-crafting? Scrapbooking about Quilting

Gabriela SimsComment

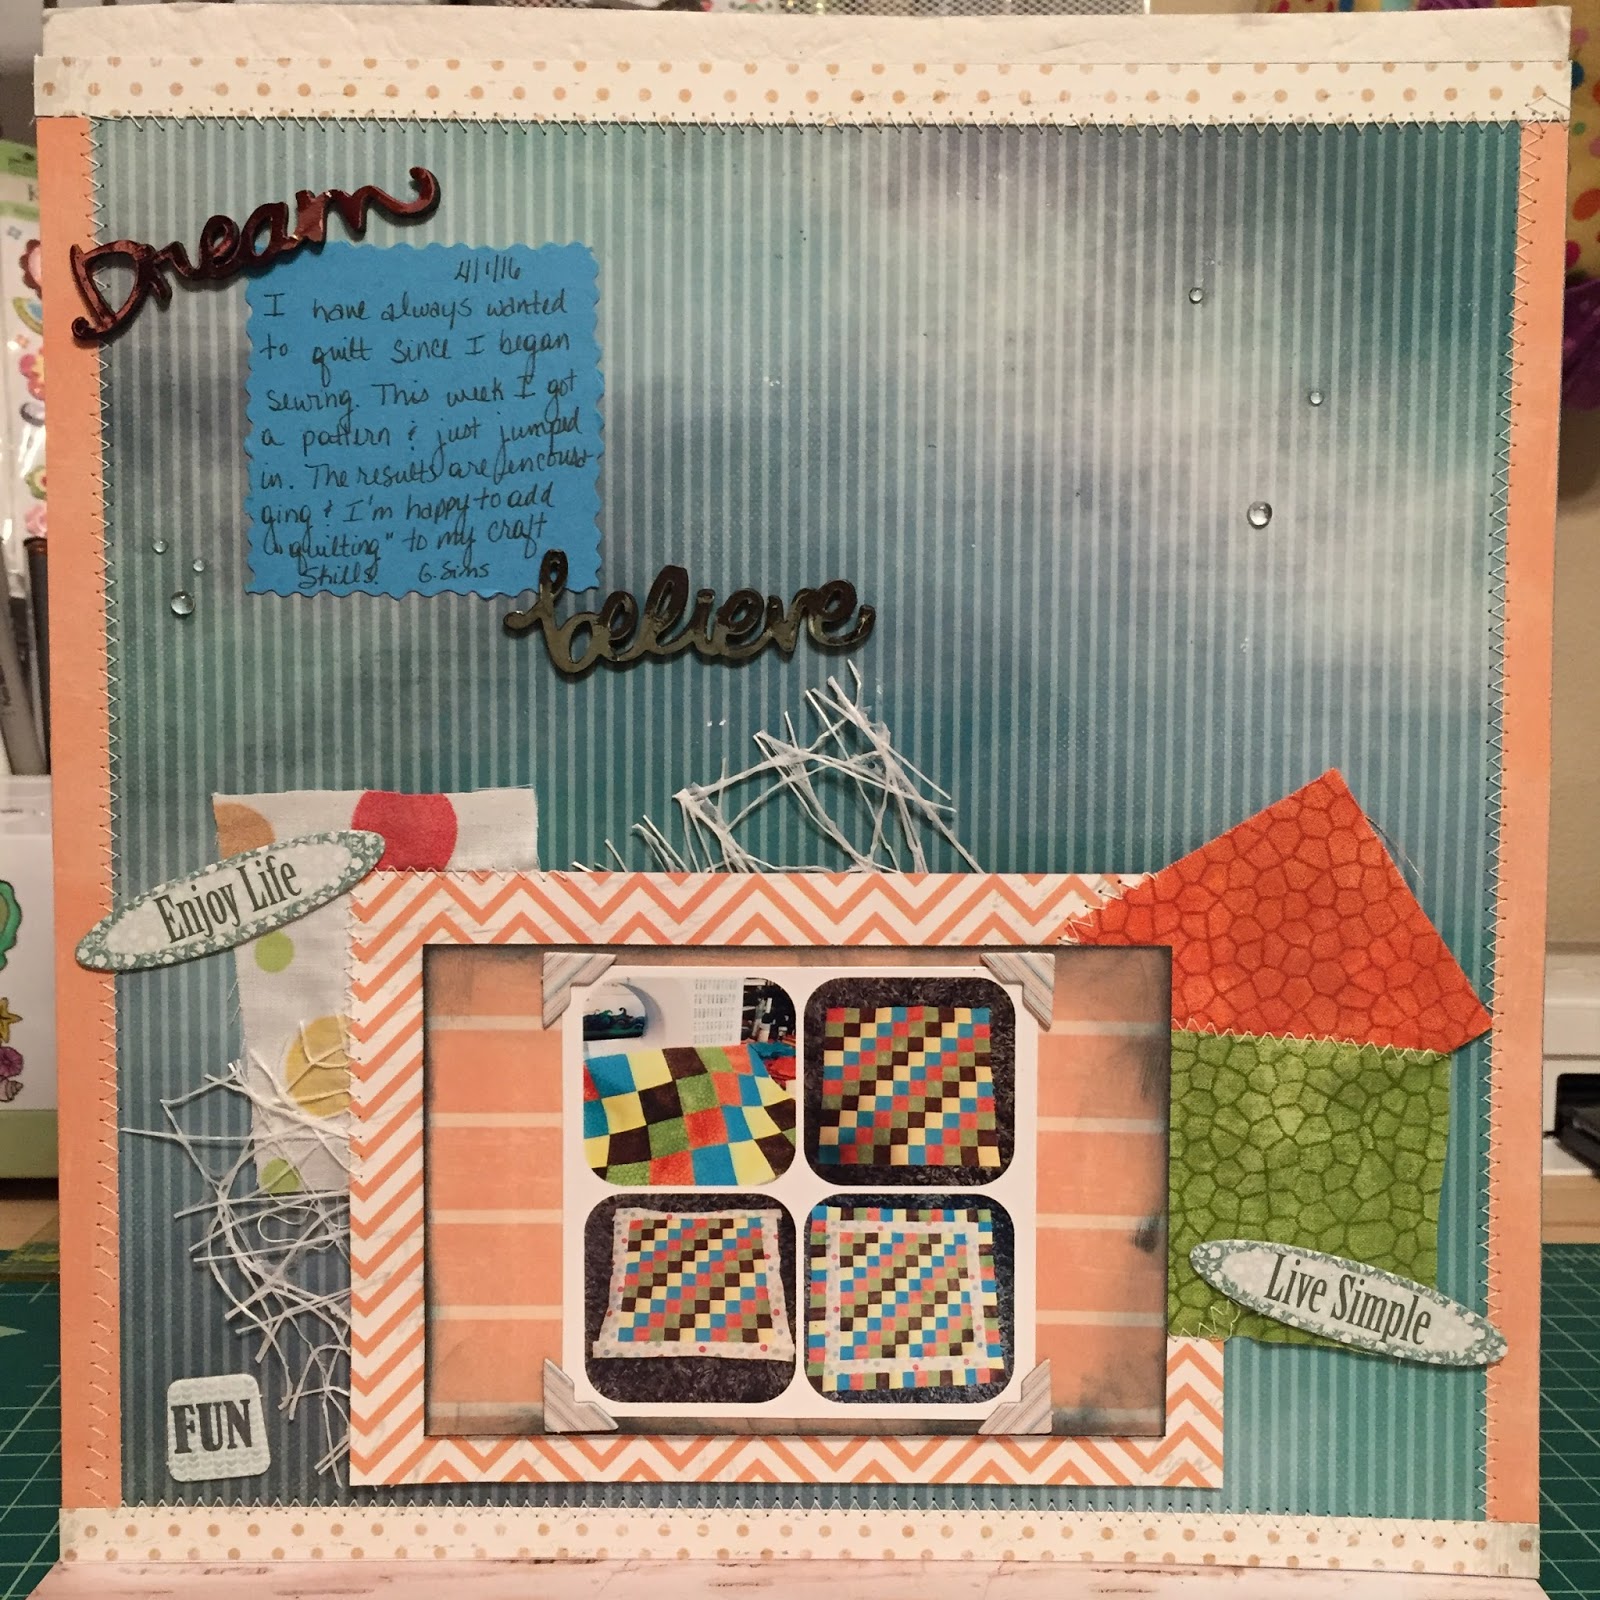
Hello everyone, Gabriela here with a scrapbook layout using the Anchors Aweigh Collection.  I wanted to make a page today that was personal, but I didn't want to use a photo of myself, instead I used my latest project, a baby quilt. This is my first quilt and I wanted to make a page that expressed believing you can do something and that showcased the project. I started with my background sheet and sewed my borders onto it with a zigzag stitch.


Next I added some fabric to a 5" x 7" rectangle and I did some sewing on that using the same stitch as the background border.


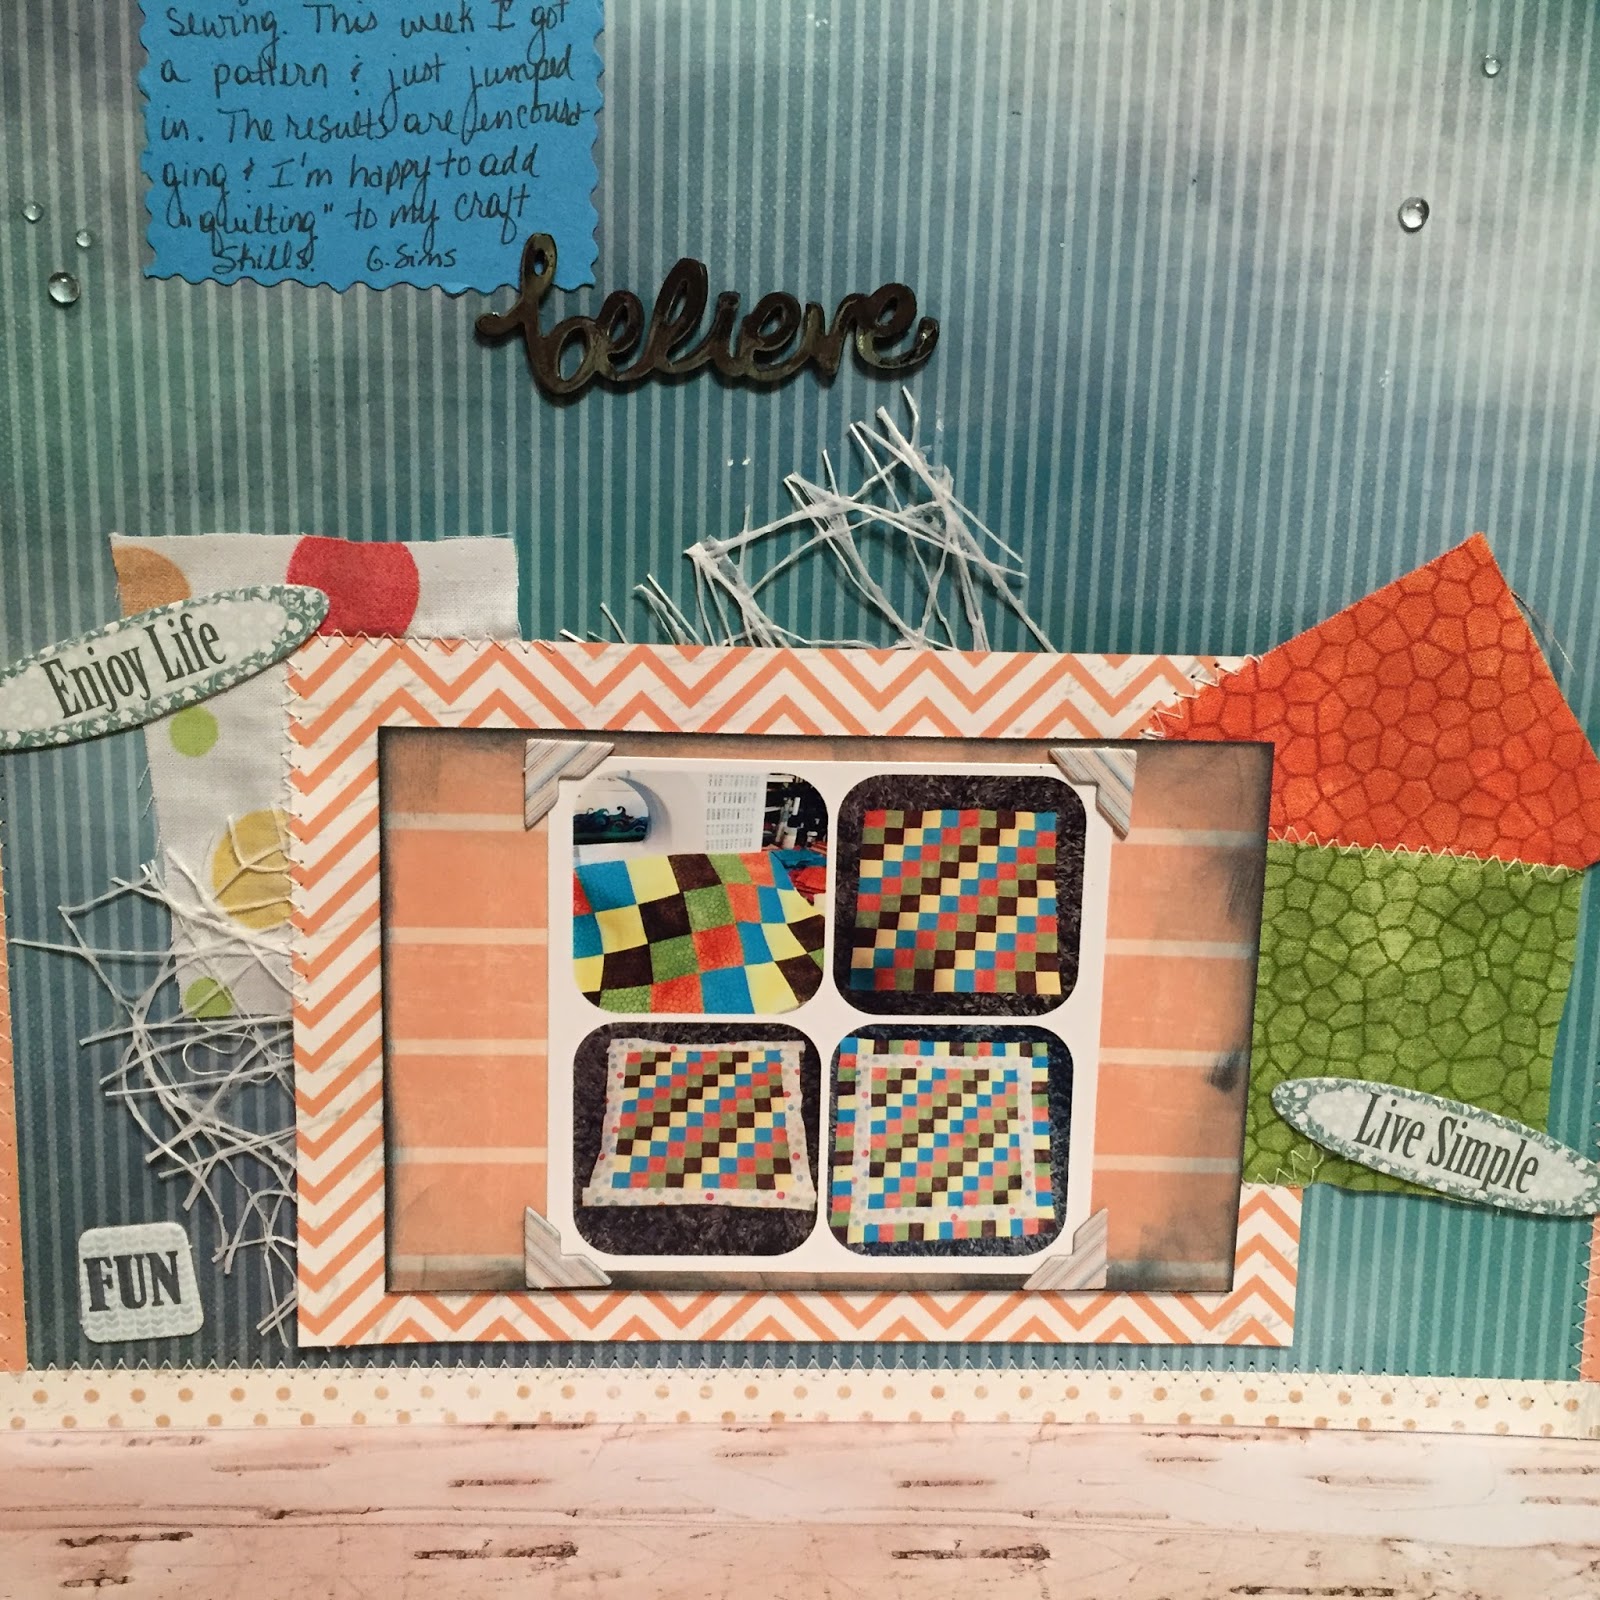
I mounted my photo on a 4.25" x 6.25" rectangle that I chalked with Navy Ink.  The next step was adding some embellishments and journaling.  I also decided to do a different type of photo for this since I wanted to show the progress.  Here's a look at the collage style photo I used to show some of the quilt progress to date.


Today's page allowed me to use a variety of my tools including my Minc, my Big Shot, and my sewing machine, it was nice to blend so many crafts to make one thing. To make the "Dream" and "Believe", I die cut the shapes from toner paper and then from fun foam. I ran the toner paper cuts through my Minc using two colors and then glued them to the fun foam for some dimension. This was a very fun page to make and the colors worked perfectly with the fabric I was using for my quilt. I hope this inspires you to scrap a hobby or interest as well.  Thank you for stopping over.


Quick Quotes Products Used:
Anchors Aweigh - 101, 105, and 104.
Powder Puff Chalking Ink - Navy
White Mesh 

A quick gift idea!

Crafts, Cards, How to, Stamps, Tutorial, Paper crafting, Diy, Supplies, Coloring, Graphic, ColorGabriela SimsComment

I was thinking of something fun to do for my friend, she's a teacher, and I thought personalized notecards would be a good idea. I made 10 cards using a small Recollections stamp set I've had forever, a scallop punch, some distress inks, and some Copic markers.


Halfway through the process. 

Halfway through the process. 

It took me about an hour to make them and then I let the Stickles dry, so let's say an hour and a half. I made two of each design. 


Before being personalized. 

Before being personalized. 

Then I made a word document to add the name and cut it out, then rounded and inked the edges. 


I also added a little Wink of Stella to some of them. 

I also added a little Wink of Stella to some of them. 

Now I'll put them in an acetate box and mail them to her for some awesome happy mail. Try these out, they're super easy to make and they will give you a chance to use any small stamps you have around, happy crafting! 

Shaker card for hope

Supplies, Tutorial, Stamps, How to, Paper crafting, Crafts, Cards, Diy, Tools, ColorGabriela Sims1 Comment

I recently found out someone I know was battling a serious illness and they beat it. I immediately wanted to make them an extra special card, here it is! Start by cutting a 4 x 5.25 inch piece of card stock

4 x 5.25  

4 x 5.25  

and another at 4.25 x 5.5 inches.​

4.25 x 5.5

4.25 x 5.5

Then cut a shape from the smaller block and a circle smaller than the shape you chose out of the larger block.  


Big shape small block, larger block smaller circle. 

Big shape small block, larger block smaller circle. 

Then mark the front of your notecard base and cut out the same circle. 


Mark the card.

Mark the card.

Also mark the inside of the card to line up with the opening.

Cut a piece of acetate the same size as the 4 x 5.25 block and attach it.


image.jpg

Cut a piece of craft foam to 4 x 5.25 and cut a bigger circle out of it.


Foam piece. 

Foam piece. 

Cut this circle. 

Cut this circle. 

Attach the foam to the smaller block. 


image.jpg
image.jpg

​I decided to stamp a small flower on the front and added some rain stones.

Flower stamp. 

Flower stamp. 

I attached them with my Pick-me-up and some Glossy Accents. 

I attached them with my Pick-me-up and some Glossy Accents. 

Attach another small piece of acetate behind the circle opening on the bigger block. 

image.jpg

Next, pick out what you want to put inside of your shaker and attach the layers.

image.jpg
Finished card front. 

Finished card front. 

Now attach the front to the card base and line up the circle cut outs.


image.jpg

Now you can stamp your sentiment where it will be visible through the front. 


You'll see the "hope" through the front. 

You'll see the "hope" through the front. 

Finished card! 

Finished card! 

I hope this inspires you to make a card and brighten someone's day! Happy crafting! !! 

Watercolor, hand lettering, and masking.

Drawing, Color, Paper crafting, Supplies, Tutorial, Graphic design, Graphic, How to, Tools, Cards, Diy, Coloring, Watercolor, CraftsGabriela SimsComment

I wanted to try doing some hand lettering and water coloring and I thought the easiest way to do it would be to use my Molotow masking pen.  

I started by finding a quote I really liked from Aesop, and hand lettered it in pencil on a piece of Bristol paper. 


Beginning and some guide lines. 

Beginning and some guide lines. 

Completed quote

Completed quote


Then I covered all of the lettering with the Molotow masking pen. 


All masked and ready to go. 

All masked and ready to go. 

What I should have done here is erased my guidelines, but I didn't so they're slightly visible in the finished work, but if you are making this, now is a good time to erase them being careful not to disturb the masking fluid. 

Then I added my watercolor background and dried it with my heat tool.

Before the reveal... 

Before the reveal... 

Finally I removed the mask with an adhesive eraser (they're very handy and won't cause your paper to pill). 


Finished product! 

Finished product! 

Overall, I'm pretty happy with the results! The next time I do this though, I will erase my guidelines earlier and I will use a lighter sketch pencil when I do my hand lettering. Hope you enjoyed this, Happy Crafting! 

Making Digistamps

Diy, Cards, Paper crafting, Drawing, Stamps, DigisGabriela SimsComment

So I had the idea to start turning my drawings into digital stamps so here is my first sketch. This little geisha will be the first in a series!  

Pencil outline first. 

Pencil outline first. 

Marker

Marker

Now she's all done. 

Now she's all done. 

I will start posting these in my etsy shop for people to download and color! Happy Crafting!  

All colored in with Copics

All colored in with Copics

All colored in with Tombows  

All colored in with Tombows  

I really liked both, but the Tombows started to bleed at the end 😭. I still love them for watercolor paper though.