Gab with Gaby

An engineer's creative corner studio.

imadethis

Xyron and Quick Quotes, Destash Those Scraps

Cards, Xyron, How to, Tutorial, Paper crafting, Crafts, Diy, ToolsGabriela SimsComment

Hi everyone, Gabriela here today with a video that will help you destash your scraps. I have so many nice scraps from several Quick Quotes Collections that I hate to waste them, so here is a fun way to combine your scraps with a paper trimmer and die cutting to get a brand new look of patterned background paper.


I did a video for this technique because I thought that would be easier to follow than pictures. If you use this technique, you can make about a dozen cards in an hour. This technique would also work on a scrap page as a cool background accent, check out the video below.


I hope the video was easy to follow and that you have a great new way to use your scraps and make them brand new again. Thanks for stopping by.

Quick Quotes Products Used:

Whistlin Dixie

Earth Wind Fire

Urban Oasis 

49 Shades of Grey

Chiffon

I am so happy to share this, the Xyron Creative Station made this so easy to finish. Until next time, Happy Crafting and stay safe in these crafting streets.

-Gaby

Be a Peacock!

Color, Tutorial, Drawing, Graphic, Crafts, Supplies, How to, Diy, Cards, Coloring, Paper crafting, Hand LetteringGabriela SimsComment

So I have been participating in the #sisterswithheartinart challenge on IG, and every week there's a new prompt, this week was  "Peacock", so I took it all the way. I started by drawing on black card stock.

I used Prismacolor pencils. 

image.jpg

Then I colored the body in and cut out the outline. 


Just the body, but I left the bottom connected. 

Just the body, but I left the bottom connected. 

Then I got my bag of feathers. 


Might be messy... 

Might be messy... 

Then arranged them behind the body. 


First feather. 

First feather. 

Then I attached it all to a distress inked background. I also hand lettered the quote and mounted it on glitter paper. 


So many feathers! 

So many feathers! 


This did take a while, but It was really fun, next post will be my first post for Quick Quotes! Happy crafting!

Gab about your Stash #1

Tools, Color, Cards, Supplies, Diy, Graphic, Crafts, Watercolor, Paper crafting, StampsGabriela SimsComment

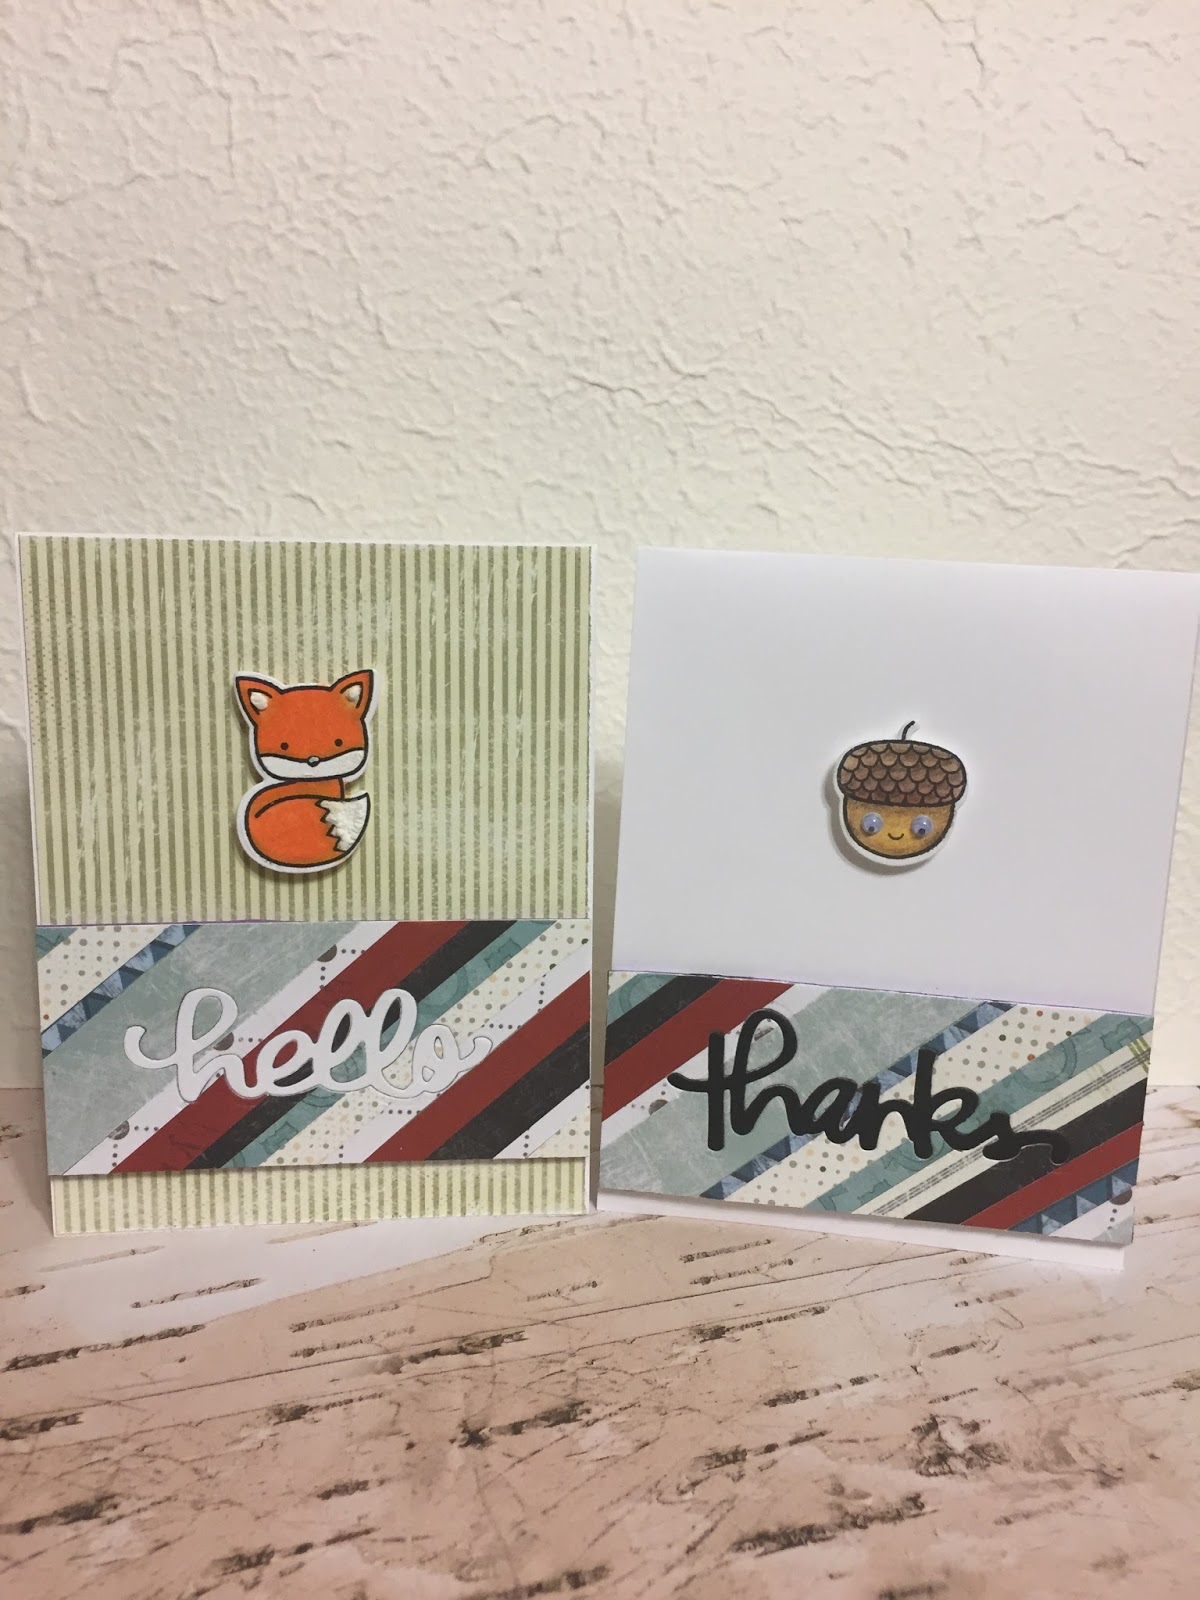
So I LOVE crafting supplies as evidenced in the craft storage post, but I'm trying to get better about using what I buy, so starting in the next few weeks, I am going to make a habit of using supplies I already have and scraps of projects from the week. I will make posts here and on my YouTube channel so that people can keep up. I will do a 10 minute Monday, a technique card, a product review, and then a Saturday Scrapternoon where I use up that week's scraps! In really excited about that and I hope it will keep me on task to create more and work through a massive stash of supplies and tools.  I have lots of tools I have never reviewed, but that I use often, so it'll be nice to share long term pros and cons.  In the meantime, here are this week's cards.


Iris folding? I can dig it! 

Iris folding? I can dig it! 

I started using supplies I have and remembered I have like 30 Gelatos and two kits!  

Gelatos and modeling paste. 

Gelatos and modeling paste. 

More with the amazing watercolors. 

This was for a challenge and the prompt was "Bright". 

This was for a challenge and the prompt was "Bright". 

Because I still love yarn! 

The Avery Elle "Made With Love" stamp set and some Copics...and a yarn chain. 

The Avery Elle "Made With Love" stamp set and some Copics...and a yarn chain. 

My first 10 minute card...that took 12 minutes! Lol, I'll be posting this video soon! 

I used nothing but supplies I already had. 

I used nothing but supplies I already had. 

Distress ink, Minc foil, and some time. 

Distress ink, Minc foil, and some time. 

That's all for today, check back in the next week or so for the new lineup of paper crafting vids and posts! Happy crafting! 

Gab about Craft Storage

Tools, Diy, Stamps, Cards, Supplies, Crafts, Color, Craft Haul, Thrift, How to, Tutorial, StorageGabriela SimsComment

So my husband agreed that it would be a good idea to convert the closet in the craft room into extra craft storage. Yesssssss! Here is how it went down.


A mess! 

A mess! 

First I removed the doors. 


Easier to see. 

Easier to see. 

Then clearing out the stuff! 


So much stuff! 

So much stuff! 

Then adding the shelves. 

Looking good! 

Looking good! 

Now the fun part, adding supplies. 


Finished! 

Finished! 

I am beyond happy with the results!! I can see and access all of my supplies now and I'll probably add a little wall storage soon, but the bulk of the work is done! The final thing I need to do is to mount a curtain rod and put a drape across the door so I can "close" it when it's not in use. This could work in any smaller closet, it took me about 2 hours to do, I bought that shelf at the home improvement store for $24.99. Let me know if you have any questions, happy crafting!!!