Gab with Gaby

An engineer's creative corner studio.

Cards

Happy Birthday Card

Cards, Crafts, Diy, How to, Paper crafting, Quick Quotes, TutorialGabriela SimsComment

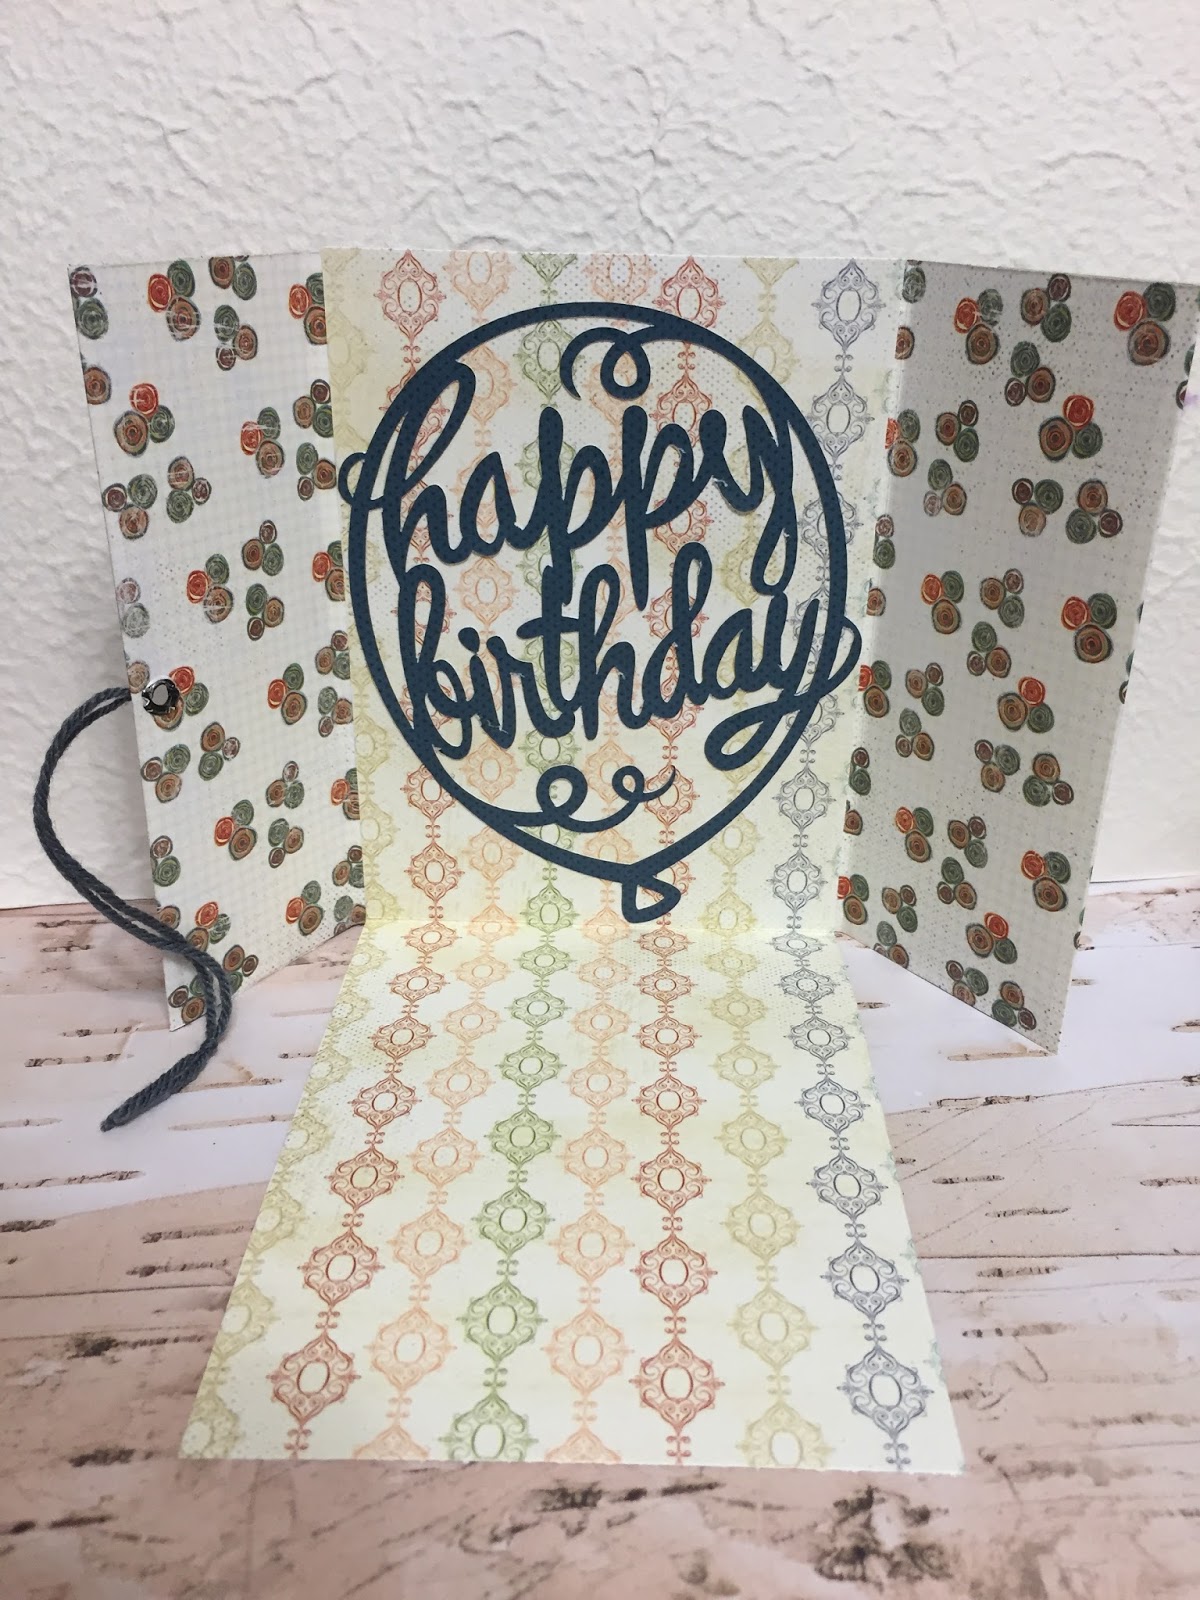
Hi everyone, Gabriela here with a masculine birthday card using the Earth, Wind, Fire collection. This is one of the new collections that will be released later this year.  The colors and patterns are gorgeous and perfect for masculine cards and pages, as well as feminine projects.   I decided to do a card with a little surprise inside, check out the video below.


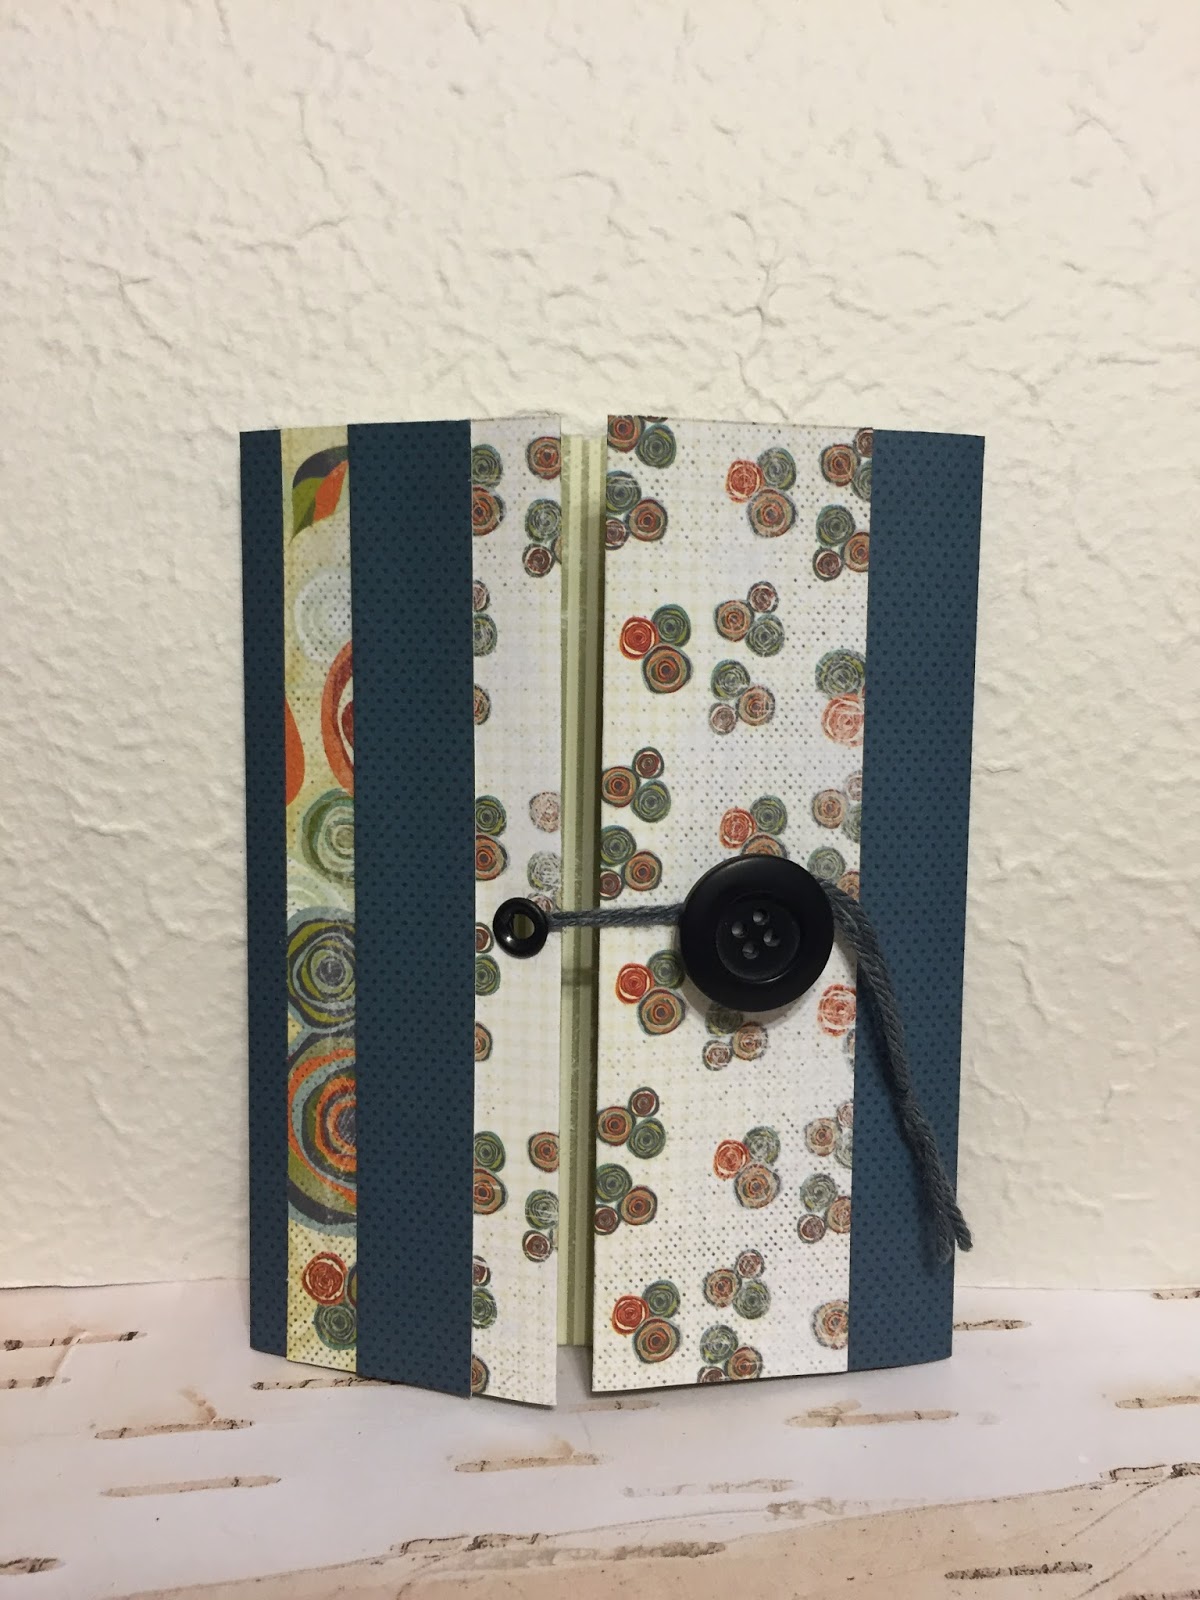
Quick Quotes Products used: Earth Wind Fire, new collection to be released later this year.

Thanks for stopping by and happy crafting!

The Silhouette Mint is Giving Me Life! (Review)

Reviews, Stamps, Cards, Tools, Diy, Paper crafting, Crafts, Silhouette, Tutorial, Supplies, Scrapbooking, Color, How toGabriela SimsComment

I recently purchased s Silhouette Mint because I love stamping and I also make a lot of handmade cards. I have been wanting a custom stamp for a long time, but I hadn't gotten around to sending my design out to have it done. So before I ordered this, I read a ton of reviews because it's on the expensive end and it has a really specialized function, so I wanted to be certain. Also this would be my first Silhouette machine, I have a Cricut Explore that I love, so I was not sure what to expect. I can honestly say I'm very impressed! The machine is very compact and lightweight, it comes with 2 stamps/stamp kits, 4 ink colors, 1 month of Silhouette Studio, and a software CD.  I have a Mac and downloaded the software from the website.


image.jpg

The included stamps are 30mm x 30mm and 15mm x 60mm. I used the rectangle to make a stamp for my website. The directions are very easy to follow and I was creating my stamp in about 10 minutes. The design software is easy to navigate and reminds me of Cricut Design Space, so I was comfortable after a few minutes.  I printed my stamp and then removed it from the clear wrapping.


image.jpg

Each set comes with a wood block to mount your stamp to and labels you can stamp to identify your image.


image.jpg

I inked up my stamp and only had a little trouble because my letters are so small, I'm going to ink it again later to see if that helps even out the image. 


image.jpg

I'm very happy that I bought this and I would recommend getting a few more stamps when you have a chance as this only comes with two. Also there are additional ink colors available, I ordered magenta when I ordered my machine. Each stamp will imprint about 50 times before you have to re-ink it, so far I've stamped about 20 images and it still looks good.  If your craft budget allows, definitely get one, happy crafting.


Quick Quotes Powder Puff Chalking Inks Coloring Technique

Cards, Color, Coloring, Crafts, Diy, Quick Quotes, Paper crafting, How toGabriela SimsComment

Hi everyone, Gabriela here today to show you a fun way to use your Powder Puff Chalking Inks as markers and to demonstrate how I made the butterflies from this post. I decided to make a birthday card from the sentiments I had and a sheet of Farmhouse paper, I also used a butterfly from this month's Club Q, check out the video below:


 Quick Quotes Products Used:
Powder Puff Chalking Inks
Farmhouse 101
Quick Quotes Sentiment
March Club Q

Happy crafting!

Alphabet Punch Board Review

We R Memory Keepers, Crafts, Graphic, Tools, Diy, How to, Color, Reviews, Supplies, Paper crafting, CardsGabriela SimsComment

Hi everyone, here today with a review on the We R Memory Keepers Alphabet Punch Board. I saw that this was out, but I hadn't seen it in stores yet, so I ordered from HSN (they have a really great price right now) and then filmed a video of how it works.  I am a big fan of We R Memory Keepers products, I have a Fuse, the 1-2-3 Punch Board, the Flower Punch Board and I used Pinwheels in my wedding! This one is the first one I bought without watching a demo first, so my reaction and use is "fresh". I have to say I really like it, it's perfect for banners or wall decor and figuring it out only takes s few minutes, watch the video below for the full review and see the punch board in action.


Like I said in the video, the only thing I would like to see added is the ability to have smaller letters, maybe half size. Other than that I was extremely pleased with the cut quality and the speed.  You can complete a banner in a few minutes and precutting the paper to 3" x 5" rectangles will help speed things up too! If you're only doing a few letters or numbers, you can use the board to cut your paper down to size.  I hope this video was helpful, happy crafting.