Gab with Gaby

An engineer's creative corner studio.

Supplies

The Daily Marker 30 Day - Day 5 & 6

Paper crafting, Supplies, Watercolor, Cards, Coloring, Crafts, Color, How toGabriela SimsComment

So I did these right on either side of the 5th turning into the 6th, so I just put them in one post. First up is a freehand watercolor. 


Petals done with Kuretake Watercolor

Petals done with Kuretake Watercolor

Next a distress ink background with Handlettering using Zig Clean Color Markers. 


Hand lettering and Neil Sedaka. 

Hand lettering and Neil Sedaka. 

I am also using the second drawing for the hearts prompt for #sisterswithheartinart this week. Going to try to keep up and I hope you do too, happy crafting!

My first post for Quick Quotes, On the Fence

Cards, Color, Diy, How to, Paper crafting, Quick Quotes, Supplies, TutorialGabriela SimsComment

Hello everyone Gabriela here with my first project for Quick Quotes. First let me say that I am delighted to be joining this talented group and I am really looking forward to the year!

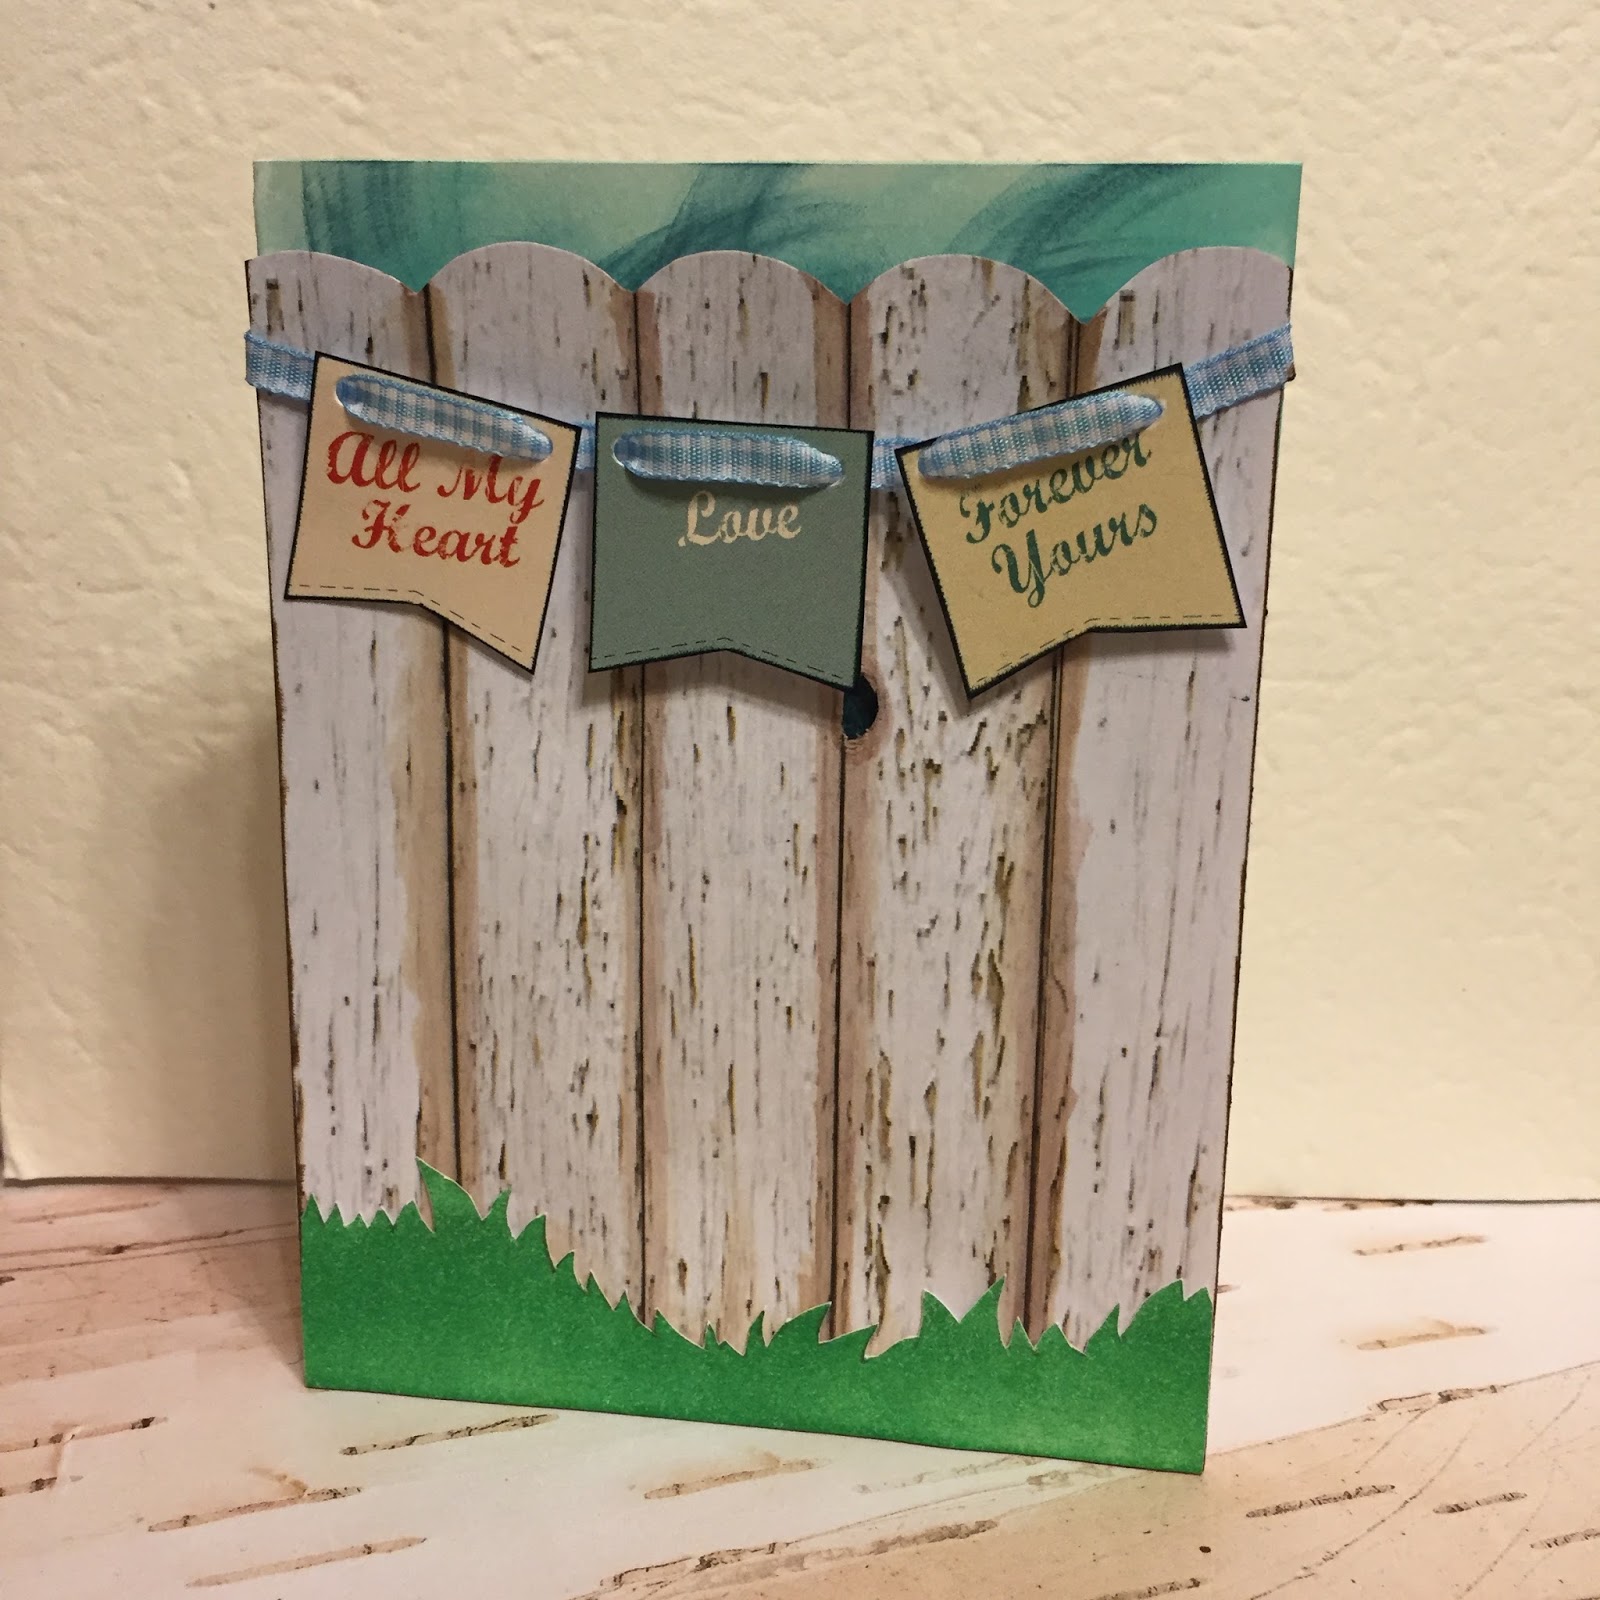
This is a sweet card that could be a Valentine's Day card or just a card to say I love you.


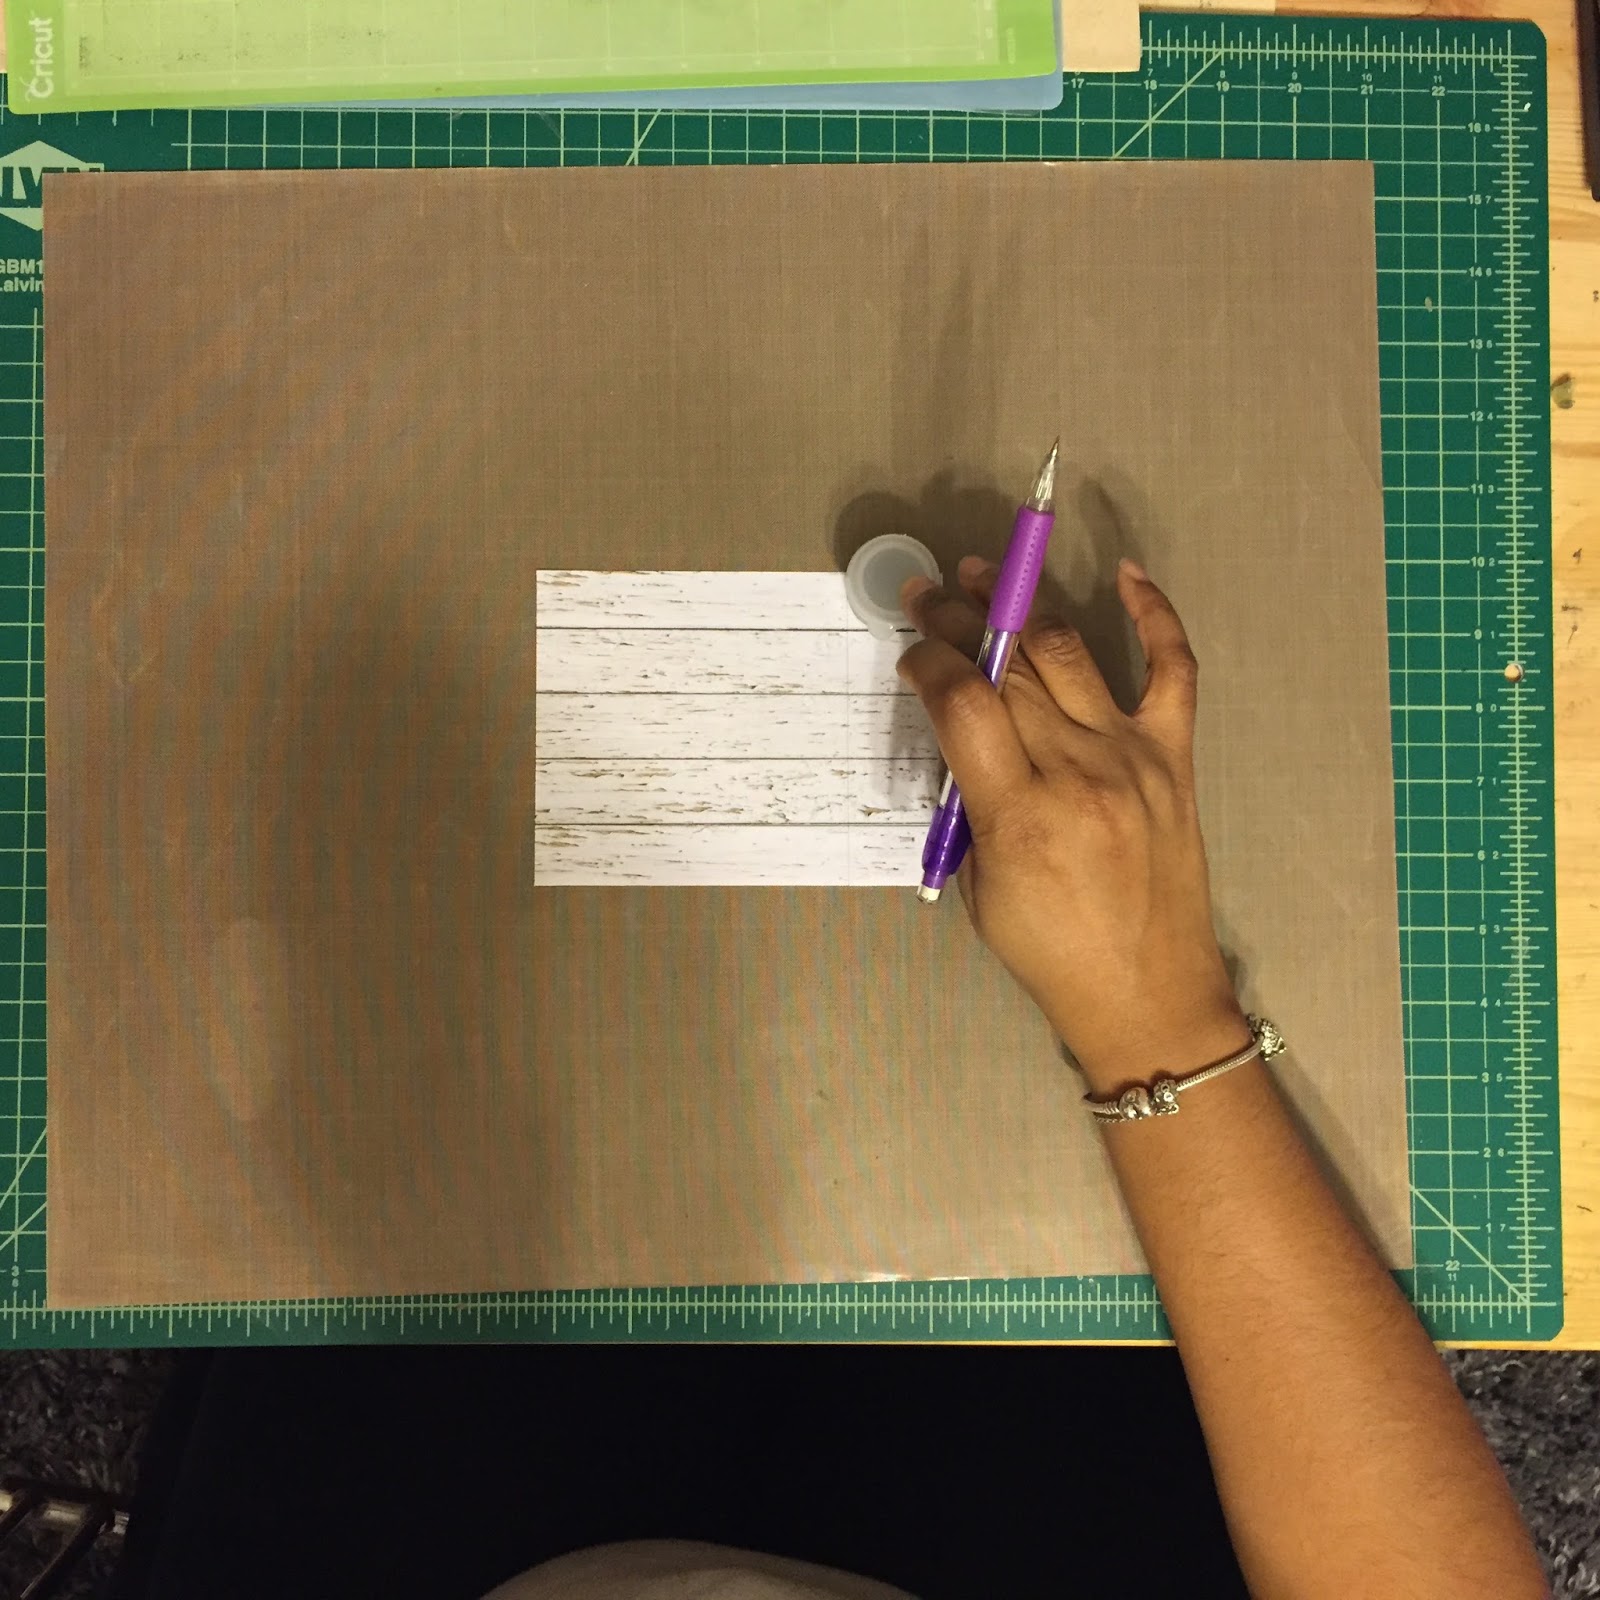
I started with Farmhouse 104


I cut a piece to A2 size, 4.25" x 5.5" and then added the scallops to make a fence by tracing the bottom of a small container.


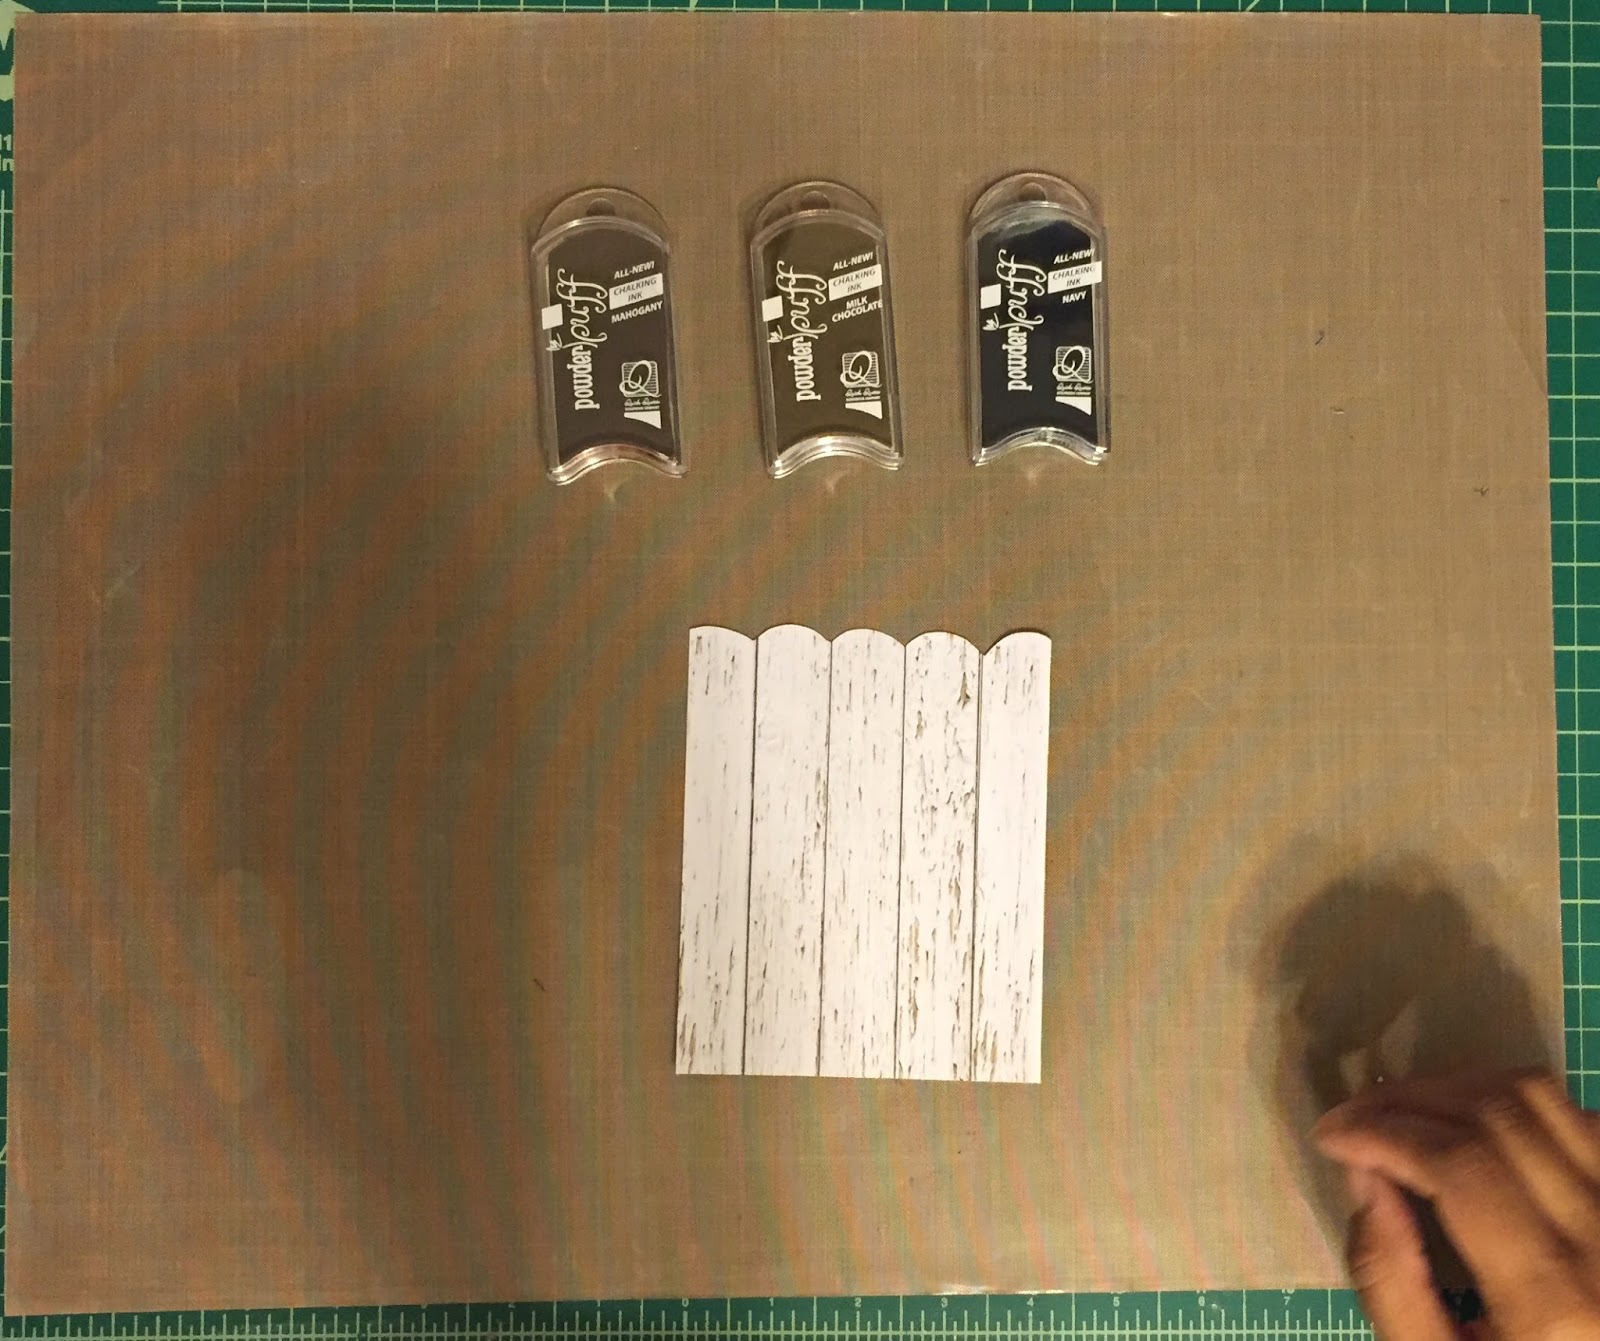
Then I used Powder Puff Inks on my craft mat with a water brush to add some aging to the fence. Shown here are Mahogany, Milk Chocolate, and Navy.

I pressed the ink pad onto my craft mat and then used a water brush to pick up color.


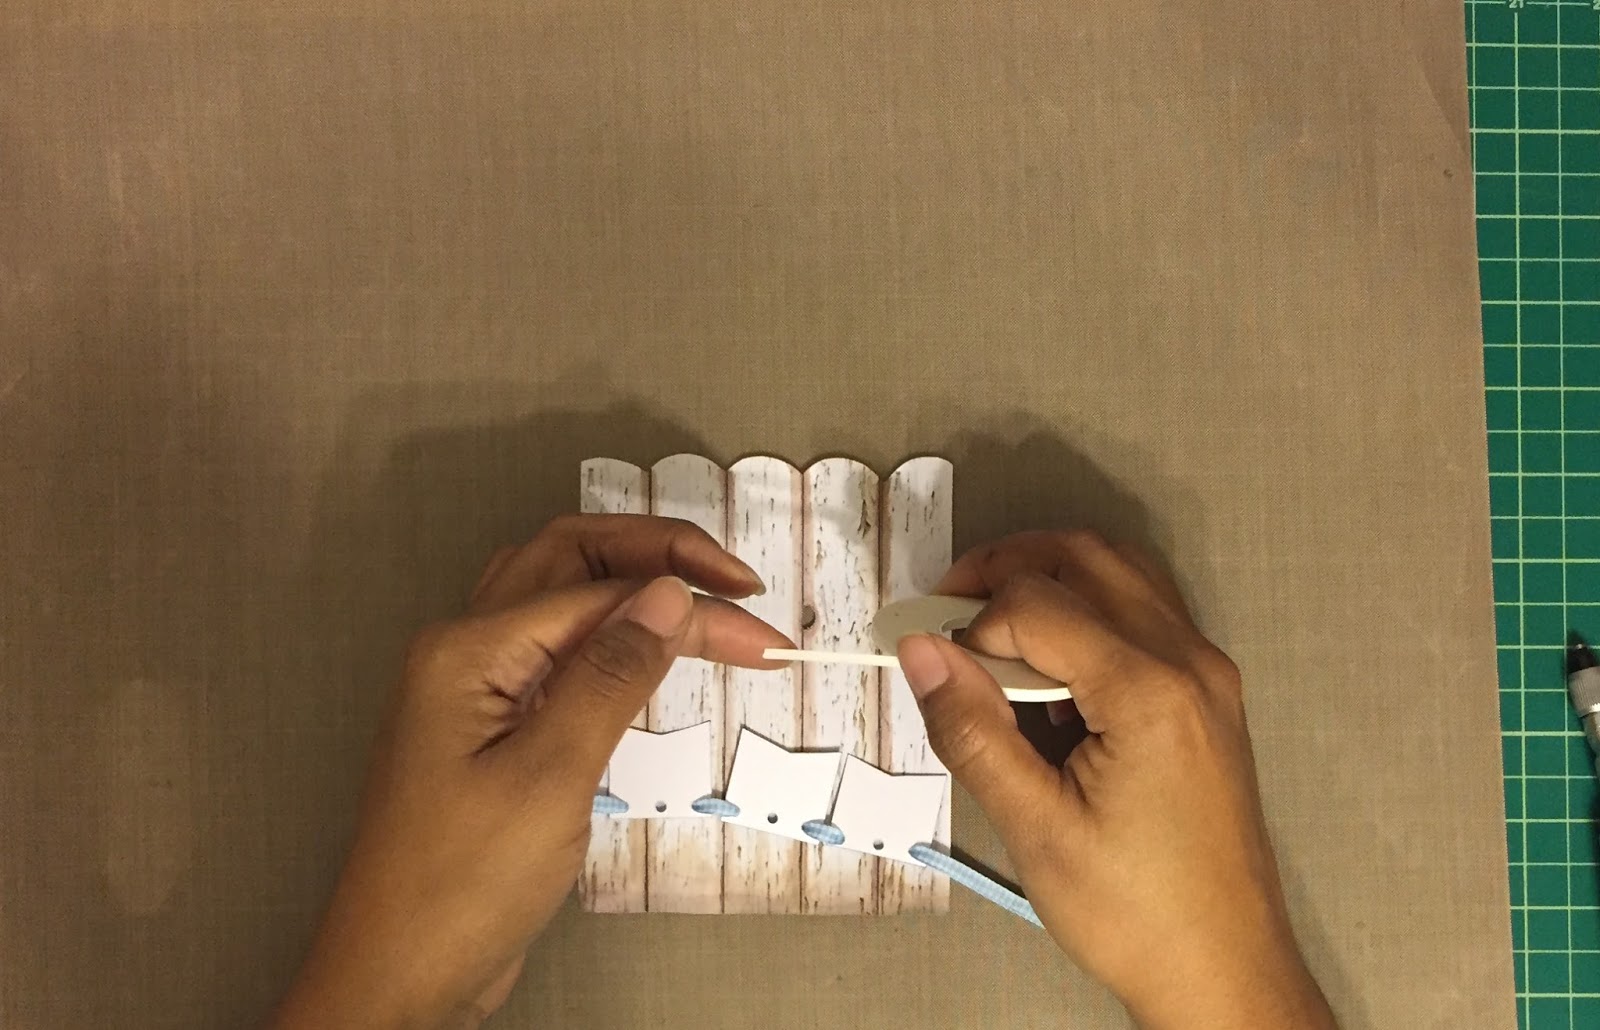
Then I cut out 3 small banners from a Words & Phrases sheet and inked the edges.


Then I punched holes in the tops and threaded them onto a piece of  ribbon. Then I applied double sided tape and cut a semi-circle out of one of the fence panels to make it look more real.


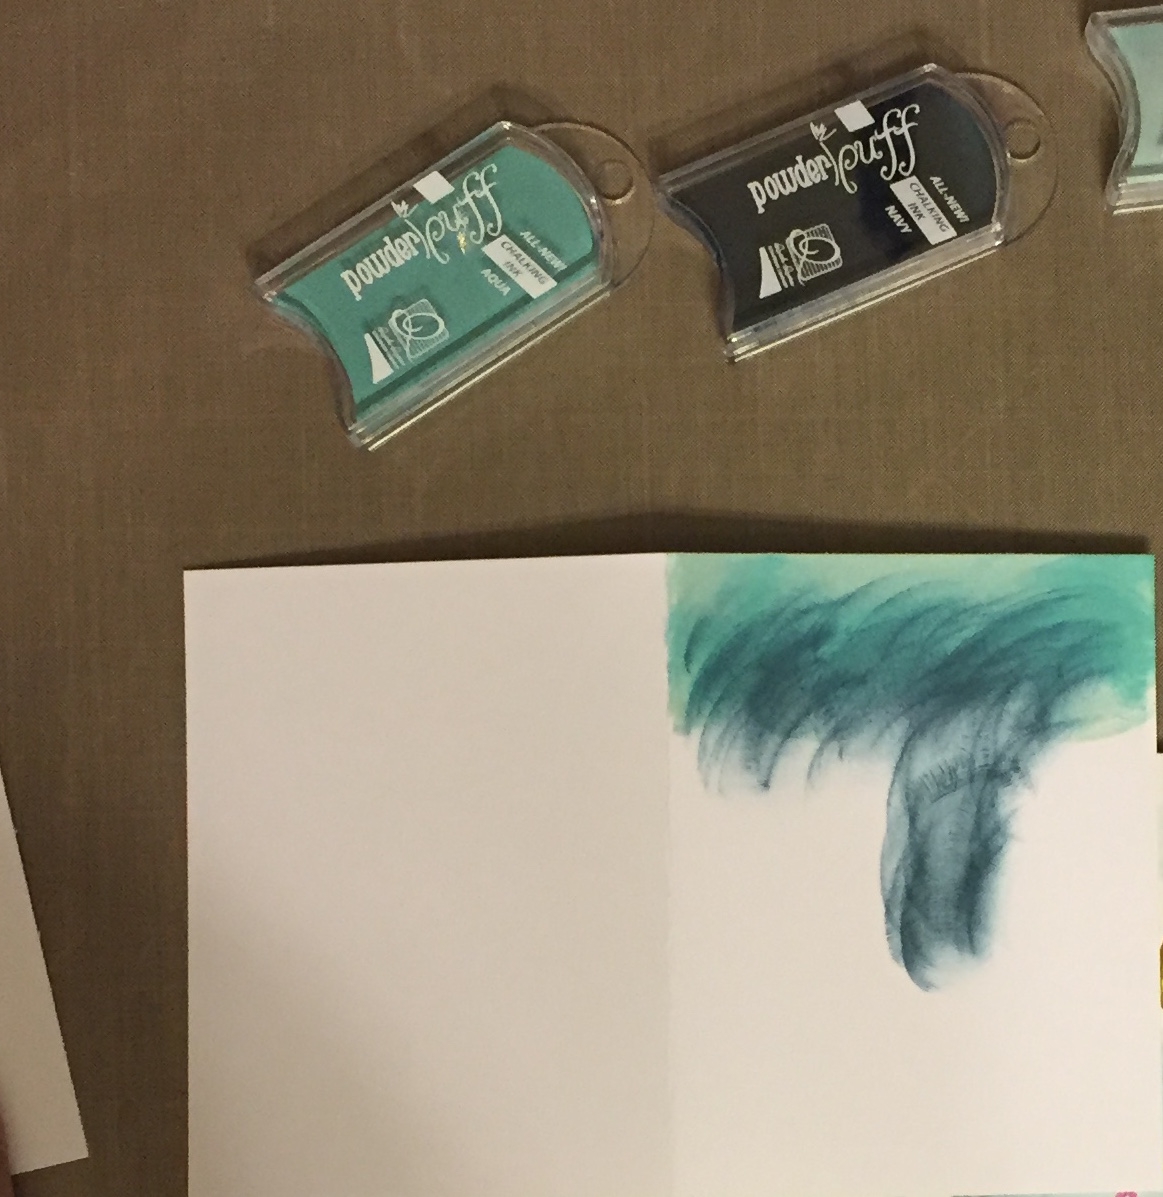
I decided to ink a background that would show behind the fence just a little. I used heavy weight white card stock for my base.  I wanted it to look like the sky, so I used Navy, Seabrook, and Aqua inks.


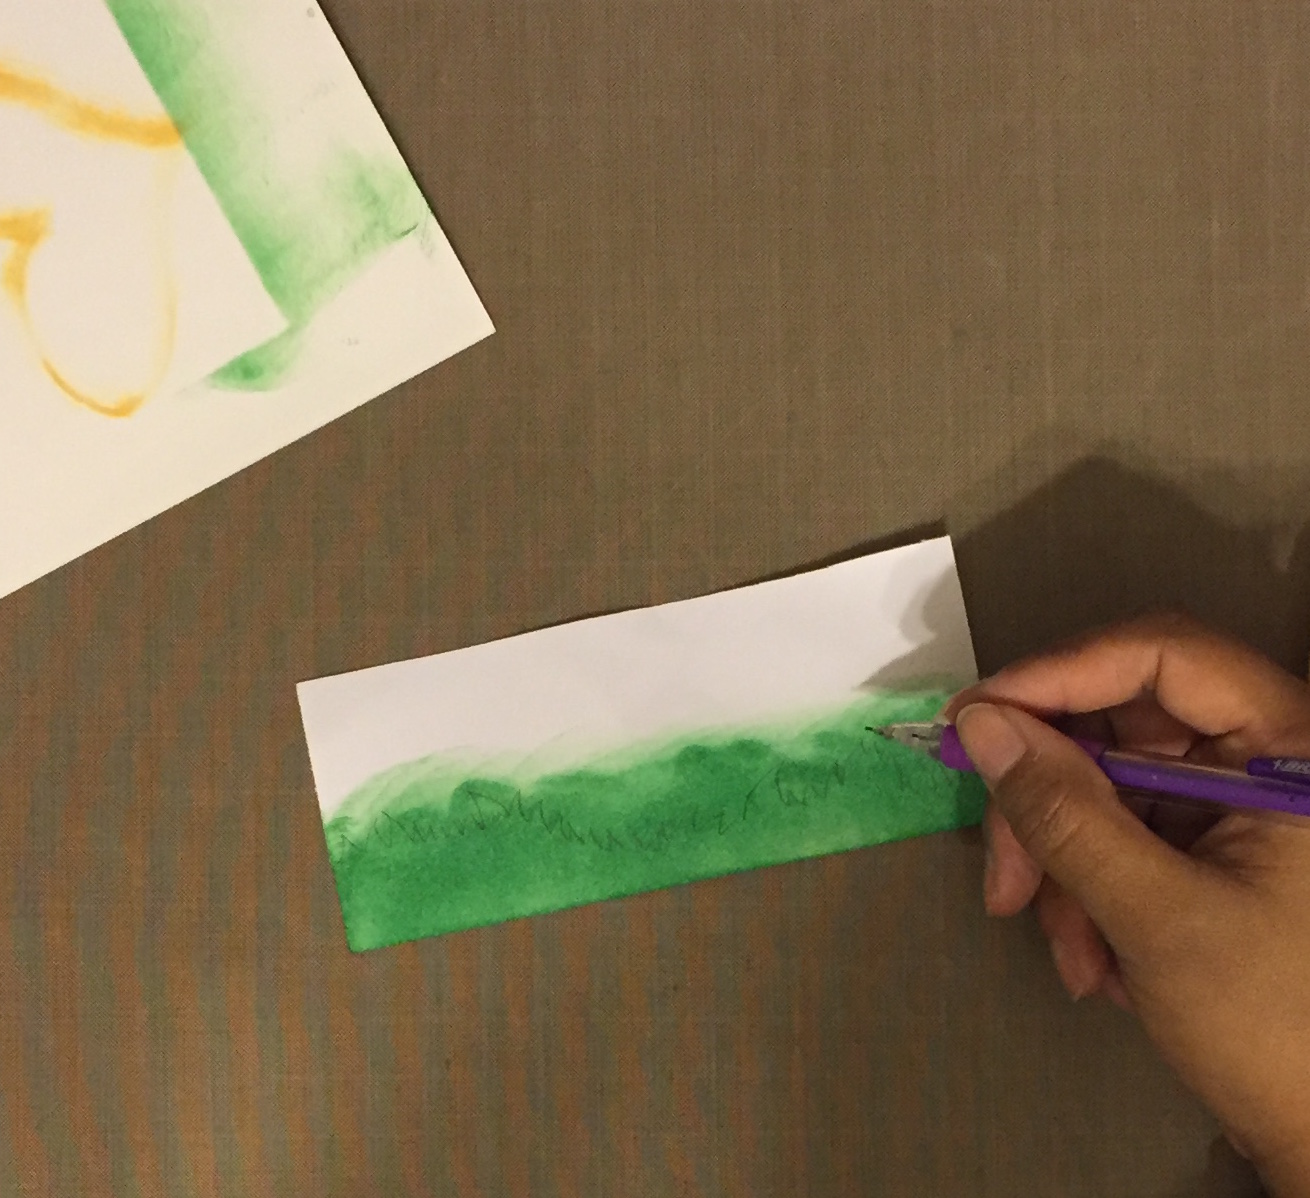
After seeing it, I decided it needed some grass, so I took a scrap piece of white card stock and inked it up using Green Leaf.


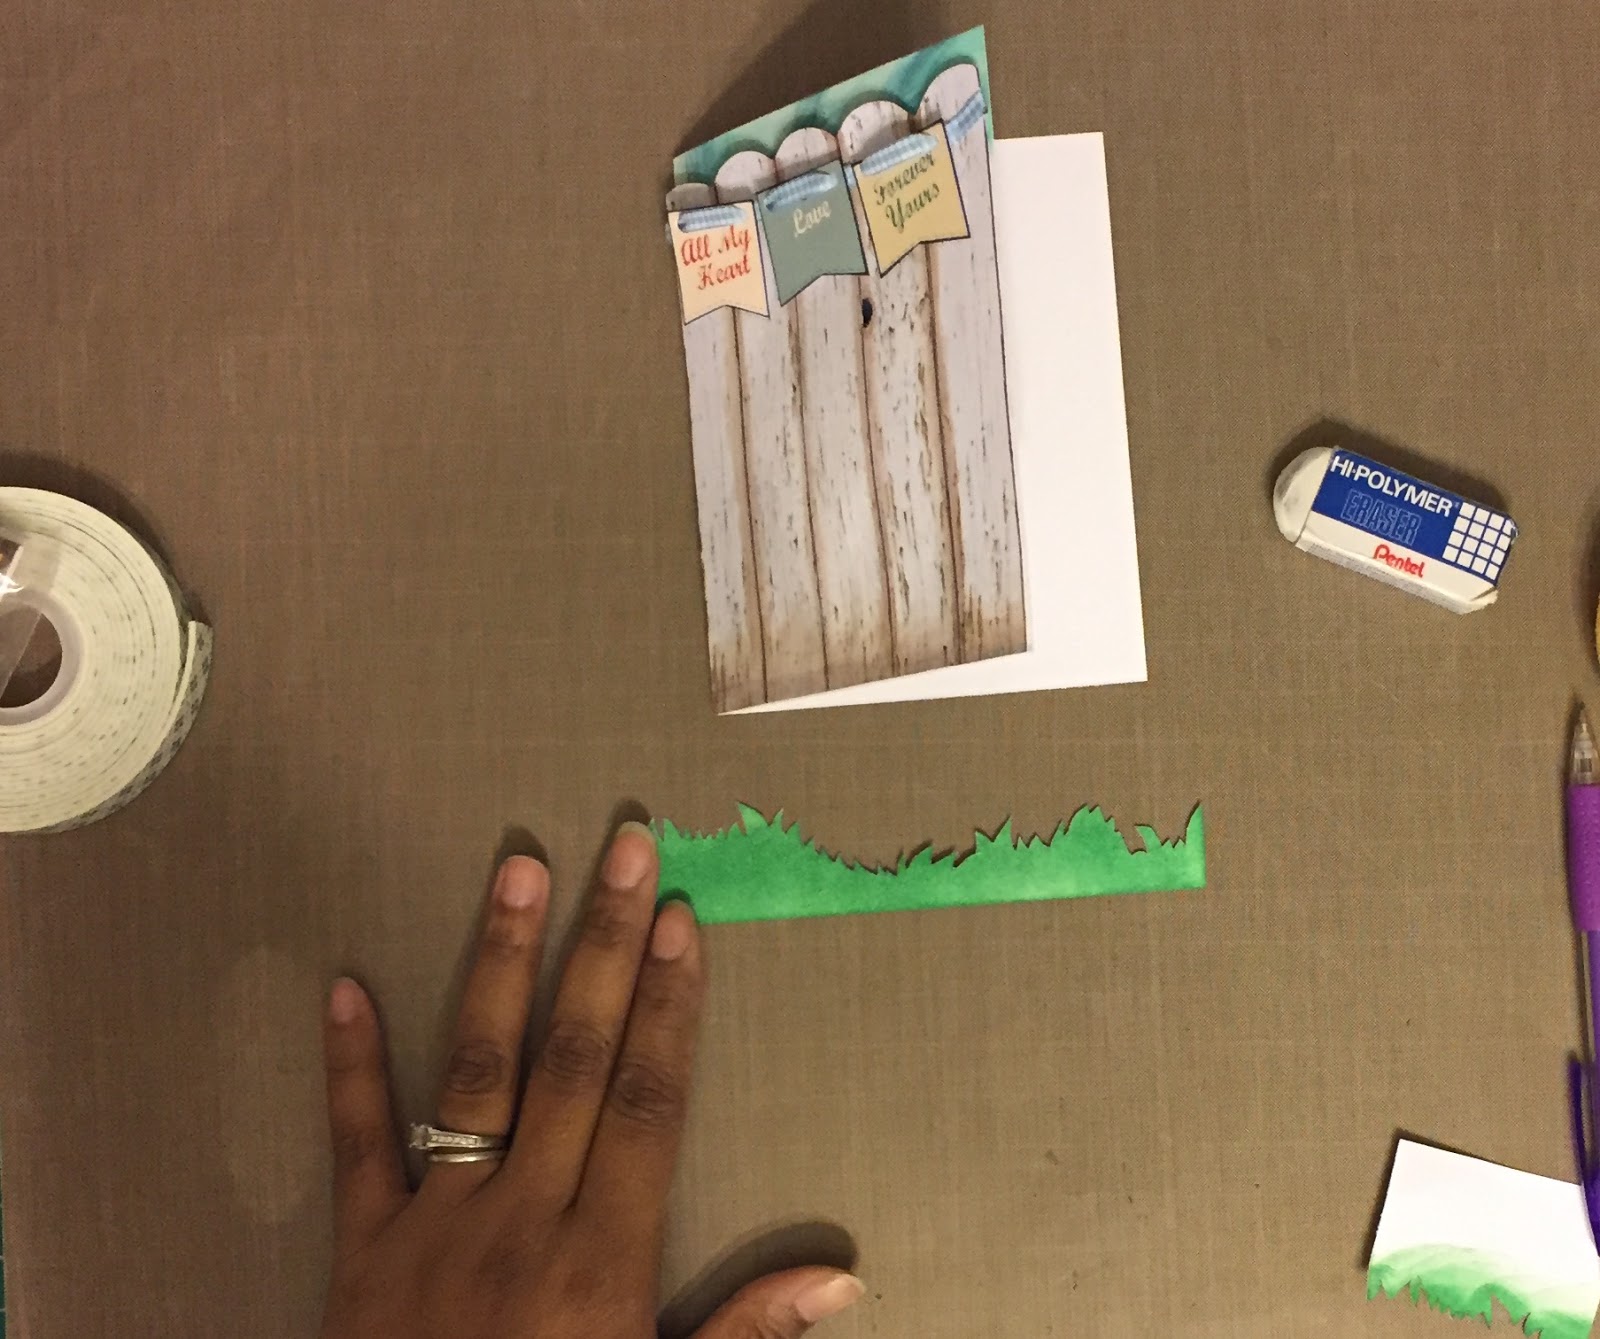
I drew some grass blades and then fussy cut the whole thing.


I attached the grass and that completed the card.


I hope this inspires you to have some fun with your supplies, happy crafting!

Quick Quotes Products Used:

Farmhouse 104
Cardstock Words & Phrases

Powder Puff Chalking Inks:
Aqua
Navy
Mahogany
Milk Chocolate
Seabrook
Green Leaf

Be a Peacock!

Color, Tutorial, Drawing, Graphic, Crafts, Supplies, How to, Diy, Cards, Coloring, Paper crafting, Hand LetteringGabriela SimsComment

So I have been participating in the #sisterswithheartinart challenge on IG, and every week there's a new prompt, this week was  "Peacock", so I took it all the way. I started by drawing on black card stock.

I used Prismacolor pencils. 

image.jpg

Then I colored the body in and cut out the outline. 


Just the body, but I left the bottom connected. 

Just the body, but I left the bottom connected. 

Then I got my bag of feathers. 


Might be messy... 

Might be messy... 

Then arranged them behind the body. 


First feather. 

First feather. 

Then I attached it all to a distress inked background. I also hand lettered the quote and mounted it on glitter paper. 


So many feathers! 

So many feathers! 


This did take a while, but It was really fun, next post will be my first post for Quick Quotes! Happy crafting!

A quick gift idea!

Crafts, Cards, How to, Stamps, Tutorial, Paper crafting, Diy, Supplies, Coloring, Graphic, ColorGabriela SimsComment

I was thinking of something fun to do for my friend, she's a teacher, and I thought personalized notecards would be a good idea. I made 10 cards using a small Recollections stamp set I've had forever, a scallop punch, some distress inks, and some Copic markers.


Halfway through the process. 

Halfway through the process. 

It took me about an hour to make them and then I let the Stickles dry, so let's say an hour and a half. I made two of each design. 


Before being personalized. 

Before being personalized. 

Then I made a word document to add the name and cut it out, then rounded and inked the edges. 


I also added a little Wink of Stella to some of them. 

I also added a little Wink of Stella to some of them. 

Now I'll put them in an acetate box and mail them to her for some awesome happy mail. Try these out, they're super easy to make and they will give you a chance to use any small stamps you have around, happy crafting!