Learn to make your own patterned backgrounds.
Quick Quotes
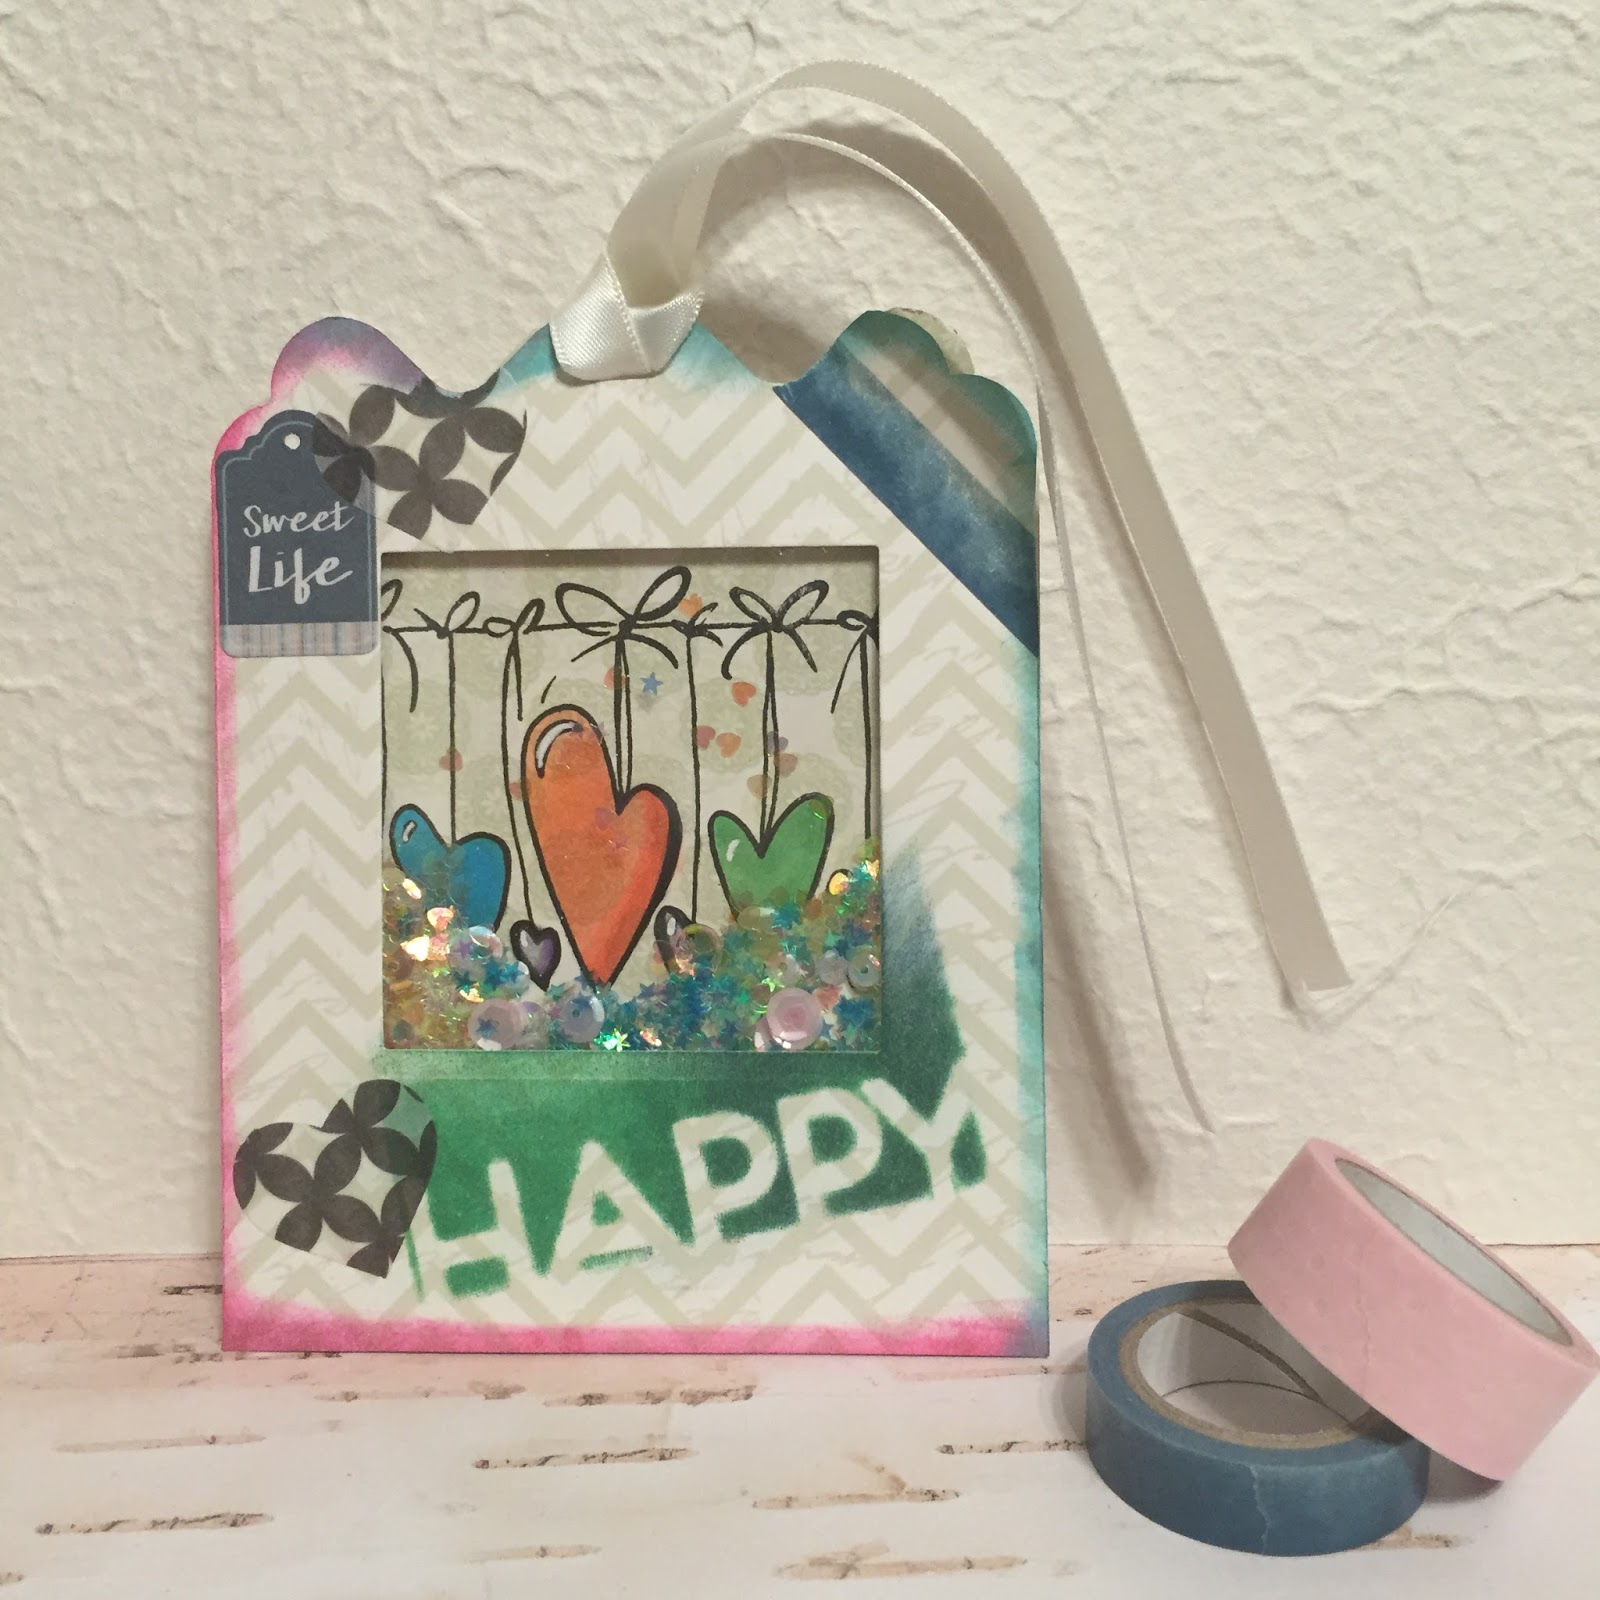
Quick Quotes Shaker Tag How to
Crafts, Paper crafting, How to, Diy, Graphic, Scrapbooking, Quick QuotesCommentHello everyone Gabriela here today with a video showing how to make a shaker tag! I started by choosing a paper from the Chiffon collection and die cutting my pieces. I stamped an image on what would be the inside of the tag and while that was drying I worked on the front of the tag. This tag can be used with a gift or it can be adhered to the front of a card. I finished it up with a stencil some Powder Puff Chalking Inks, die cut stickers, and a piece of ribbon. Check the video out below to see the whole process.
I hope you enjoyed the video and you make some shaker tags of your own, happy crafting!
Quick Quotes Products used:
Chiffon 103
Powder Puff Chalking Inks 2016
Farmhouse Die Cut Stickers
Ribbon
Quick Quotes Powder Puff Chalking Inks Coloring Technique
Cards, Color, Coloring, Crafts, Diy, Quick Quotes, Paper crafting, How toCommentHi everyone, Gabriela here today to show you a fun way to use your Powder Puff Chalking Inks as markers and to demonstrate how I made the butterflies from this post. I decided to make a birthday card from the sentiments I had and a sheet of Farmhouse paper, I also used a butterfly from this month's Club Q, check out the video below:


Quick Quotes Products Used:
Powder Puff Chalking Inks
Farmhouse 101
Quick Quotes Sentiment
March Club Q
Happy crafting!
It's real in these crafting streets...Design Teams or the Hunger Games?
How to, Crafts, Diy, Quick Quotes, Paper craftingCommentI'm an avid crafter, there, I said it, or typed it. I do projects for people and I also design, draw, and create for myself and companies. However, wrapped up in all of this is the desire to have my own stamp line and my own designs. The issue is how to get your designs in front of the right people. One thing you need is exposure and unfortunately with so many print craft magazines going out of business and LSS (Local Scrapbooking Stores) going under, a lot of visibility opportunities were lost. This leaves the obvious choice of the Internet, but even that requires the ability to not only choose the correct platform (blogging or social media), but to drive traffic to your profile/site. I have been pretty fortunate with a few hundred followers on IG and my site, but that was really some luck and a nice shout out on the Quick Quotes blog. Without that, I'm not sure what my audience would look like. This brings up the subject of design teams, I currently belong to one and I'm looking to join 1 or 2 more next year, but even that is an uphill battle. I personally only apply for design teams I genuinely want to belong to and support. This is great for keeping your skills sharp and keeping you on task as most DTs have a calendar for your projects. It's also wonderful to keep you in touch with other like minded creators. If you've applied for a team or a dozen and you were not selected, please don't give up, it can take a while to find your footing and your style. Take each application as an opportunity to improve your skills and show what you've learned, you'll be surprised at how quickly you improve. The good thing is that many teams have 6 month memberships so that gives you 2 opportunities per year. I would also suggest going for a team you're passionate about, even if it's one of the major companies because they will see through fake enthusiasm if you don't really enjoy the products. Last bit of advice is to be yourself in your designs, copying the latest trend won't work and it won't help you stand out from everyone else, offer the team leader something unique, you. That's about all I have for now, but I just wanted to offer a quick pick-me-up to anyone that is struggling with their crafting right now. It's an extremely competitive space with a lot of talented people, don't get discouraged and remember that the whole point of this is to make things and have fun! Until next time, happy crafting!
QuickQuotes - March Club Q
Color, Crafts, Diy, How to, Layout, Quick Quotes, Scrapbooking, Supplies, TutorialCommentHello everyone, Gabriela here showcasing this month's Club Q and before I get into my project, let me talk about the greatness of this kit. I received a nice variety of papers and embellishments as well as a package of Petaloo flowers. There was even a set of full instructions for making an Altered project, just a really robust kit with some nice ideas and it was nice to see the paper collections paired in ways I might not have thought of on my own. One of the things I couldn't wait to use was the blinged butterflies, they were wonderful on their own, but I decided to add a little chalking ink to them to make them more visible.


Quick Quotes Products Used
March Club Q
Powder Puff Chalking Inks - Pixie Pink, Seabrook, Aqua, Lemon Sorbet, and Mahogany
Anchors Away - 106