Gab with Gaby

An engineer's creative corner studio.

quilts

Xyron and Quick Quotes, Make a Banner Page

Crafts, Diy, How to, Paper crafting, Layout, Quick Quotes, Scrapbooking, Tools, Tutorial, XyronGabriela SimsComment

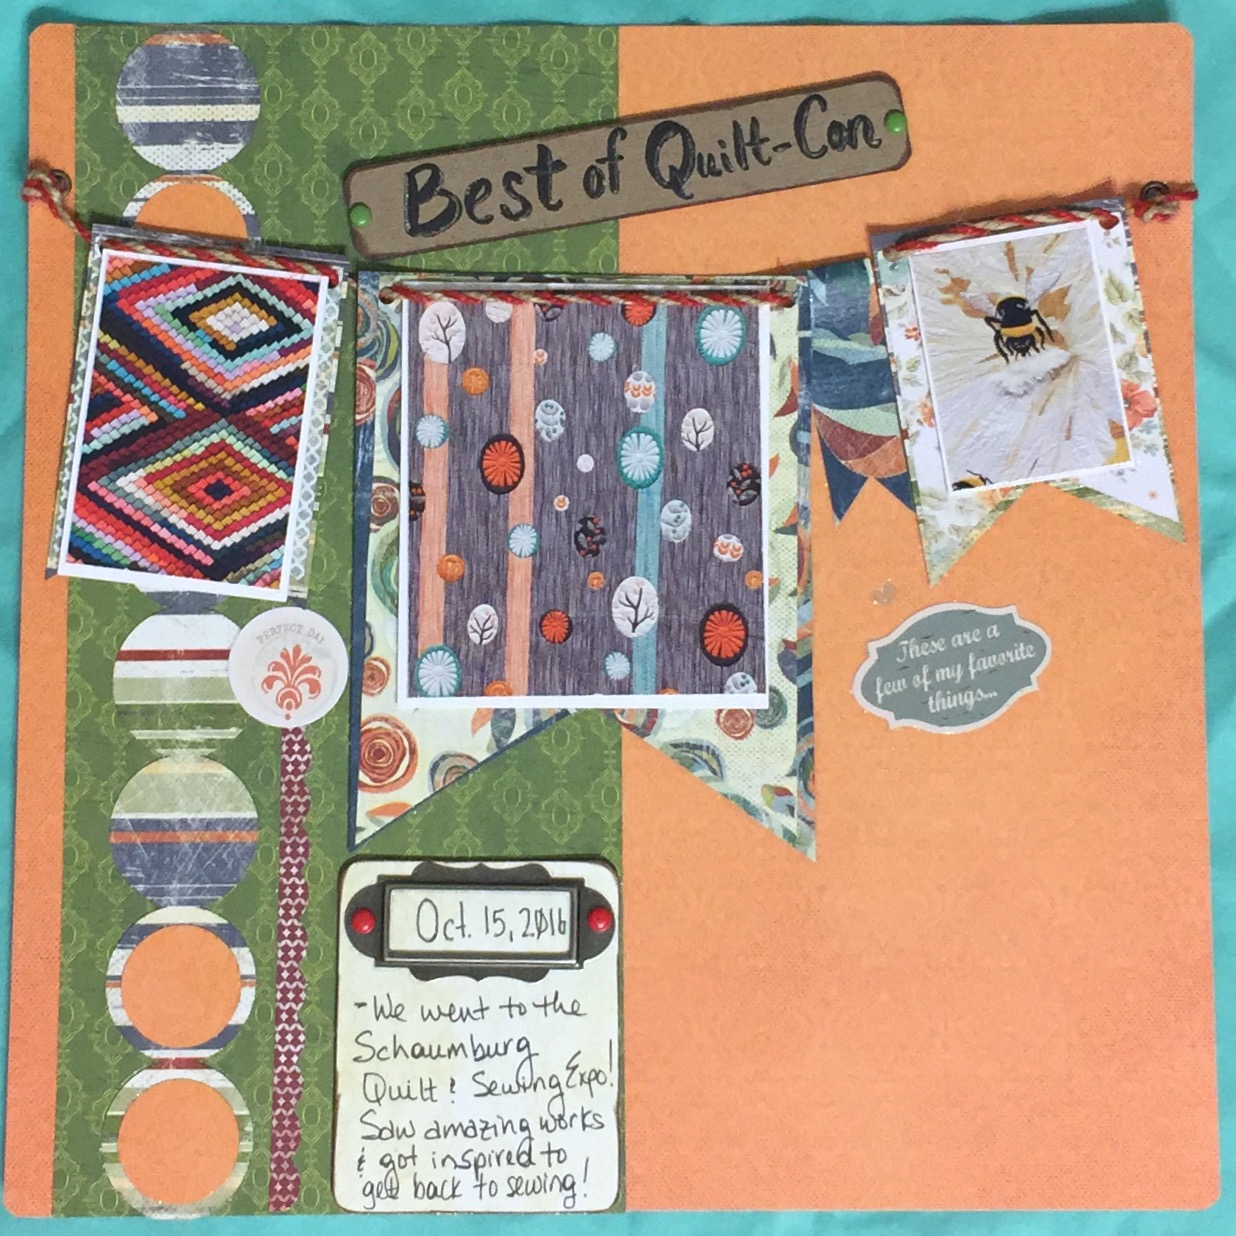
Hi everyone, Gabriela here today with a page using Club Q for this month with some help from my Xyron supplies. I made this page a banner page because of the adorable twine included in this month's Club Q. I also attended a quilt show this past weekend and decided to "hang" some of my favorites from the show on the banner. I started by choosing my 3 favorite pictures from the show and then built the page around that idea.


 Check out the video below to see how to put this page together.


I hope you enjoyed the video and you're inspired to make a banner page of your own. Thanks for stopping by, happy crafting.

 Quick Quotes Products Used:

Club Q

Powder Puff Chalking Inks - Mahogany

That amazing glitter gel pen is this amazing glitter gel pen from Sakura, it's a Gelly Roll and I love it!

Making Robot Baby Quilts is a Great Way to Spend a Weekend

Blankets, Crafts, Diy, How to, QuiltingGabriela SimsComment

Hi everyone! Gabriela here with my latest project, an easy baby quilt that you can complete on a Saturday morning/afternoon. I bought this fantastic robot fabric from Hobby Lobby and the binding as well.  I decided to use minky for the backing in a baby blue color as this quilt is for a friend having a baby boy.  First I cut a panel of the robot fabric to 36" x 36", I used some Warm & Natural batting cut slightly larger.

Fabric sandwich.

Fabric sandwich.

I tried to keep the edges as straight as possible and then I spray basted the layers.  I wanted to do some simple, clean quilting, so I used some masking tape as a guide and taped it corner to corner and then quilted along each side.

To keep the quilting even, I used my walking foot to measure the spacing.

Once the quilting was finished, I trimmed up and squared the layers.

Time to square up.

Time to square up.

I prepared my binding and attached it to the top.

So I just discovered the joy of Wonder Clips from Clover!  These cut my binding time by at least 1/3, they are handy little clips with an excellent grip.  No more using a bunch of pins and poking myself or watching my pins slip and shift.  I cannot believe I just found out about these!

Binding

Now stitch in the ditch for finishing the binding.

That's it, now you're done!

Front.

Front.

Baby Quilt with Minky

I decided to make this quilt out of one big panel because I really loved this fabric.  You could do this with any fabric that you like and you could even add an appliqué.   I hope you make a ton of quilts like this and please let me know if you have any questions.

As a bonus, I also made this little mug rug for my hubby.

Happy crafting! I'll be posting some new lettering soon too.