Gab with Gaby

An engineer's creative corner studio.

Decor

Gab about Curtains

Crafts, Decor, SewingGabriela SimsComment

Hi there!!! Are you getting ready for spring and spring cleaning? Well I am and I have been making curtains for several rooms in my house. I started in my kitchen and used some cute coffee fabric (that my hubby helped pick out) to make these:

FullSizeRender.jpg

I love them! I loved them so much that I immediately bought more fabric to make curtains for my bathroom.

I used a very simple method that allows you to make curtains for any window. I used my travel iron and my press board (that I made a while back) and had these done in about 2 hours, including cutting time. I got the pattern out of this amazing book The Best of Sew Simple Magazine, unfortunately I do not see it sold new anymore. The great thing is that the pattern in this book is very simple and can be applied to just about any window or door in your home that needs curtains. I also made valances for the tiers using that pattern.

This is my pressing board and travel iron that I use in my sewing room, they help me do quick presses and their portable in case I go to a craft retreat.

This is my pressing board and travel iron that I use in my sewing room, they help me do quick presses and their portable in case I go to a craft retreat.

I finished those kitchen curtains and then made a set for my bathroom using the same method.

This pattern is so fun! It also gives me an excuse to update some things in my bathroom.

This pattern is so fun! It also gives me an excuse to update some things in my bathroom.

I had enough fabric left over from the kitchen curtains to make some matching placemats and mug rugs, so I already have my next project picked out.

Until next time, stay safe in these crafting streets!

Happy crafting.

-Gaby

Gab about Cross Stitch

Cross Stitch, Patterns, Crafts, Decor, Diy, Needle PointGabriela SimsComment

Well hello there! Today I am sharing a project that is close to my heart! I draw when I have the time and I am always imagining things to do with those drawings. This time, I made my drawing into a cross stitch pattern and then stitched the image!

IMG_2578.JPG
Hey girl!

Hey girl!

Let me start by saying one thing. So. Many. French knots. I spent a lot of time finishing her hair, but the extra effort was totally worth the time. Her hair has so much texture and it looks so full, plus I really like patterns that have French knots, so I made this pattern with all the French knots. Let’s get a close look at those.

FrenchKnotsForDays.JPG

I spent a weekend making this, but it was a joy. One thing I would like to do next time is to make a pattern for the full body. This image measures about 4” x 3” and it’s shown in a 7” hoop. If you would like to stitch this diva up, you can purchase the pattern here. That’s all for today and until next time, stay safe in these crafting streets.

Happy crafting!

-Gaby


Quiltologie Mini Quilt Kit Review

Quilting, Tutorial, Decor, Reviews, Crafts, Sewing, How to, DiyGabriela SimsComment

Hello there everyone! I saw these wonderful quilt kits at JoAnn and decided to try one out. They come with everything except the batting, fusible web, and thread, but if you quilt, you already have those things! The pattern has all of the cutting and piecing instructions; so you can get started right away even if you do not have any batting handy. I did my cutting all at once and then started piecing.


These are eyes! 

These are eyes! 

The most satisfying part was getting all of my fox blocks done.  This is also the most challenging part, if you make it through this, everything else is a breeze.


Pressed and ready! 

Pressed and ready! 

I finished with some simple FMQ and this is now proudly displayed in my cube at work! 


This was before the "final" press. 

This was before the "final" press. 

I had a great time making this and I was able to complete it in a weekend, but you could do it in a few hours if you focus. I think it's totally worth the price and if you use a 40% off coupon, you can get it for under $10. There are several patterns available, so if you want to start quilting, these are great! Thanks for stopping by, happy crafting!

-Gaby

Balloons for a Craft Show

Gab with Gaby Stamps, Balloons, Craft Shows, Crafts, DecorGabriela SimsComment

Hi everyone! Gaby here with some real talk about balloon decor. First let me start by saying I have never done balloon art or balloon sculptures in my life...until last Sunday. I decided to add balloons to my setup for the craft show, so I started watching a few YouTube videos...and this happened!

FullSizeRender.jpg

I had so much fun making that, I made this: 


IMG_7059.JPG

And this: 


IMG_7078.JPG

And finally, this: 


IMG_7074.JPG

That was all in the span of a few days, but I really enjoyed it. I am still working out my booth decorations, but rest assured there will be balloons! Happy crafting!


-Gaby

Building the Workbox 3.0

Storage, Craft Room, Workbox, Gab with Gaby Stamps, Decor, Diy, Organization, CraftsGabriela Sims1 Comment

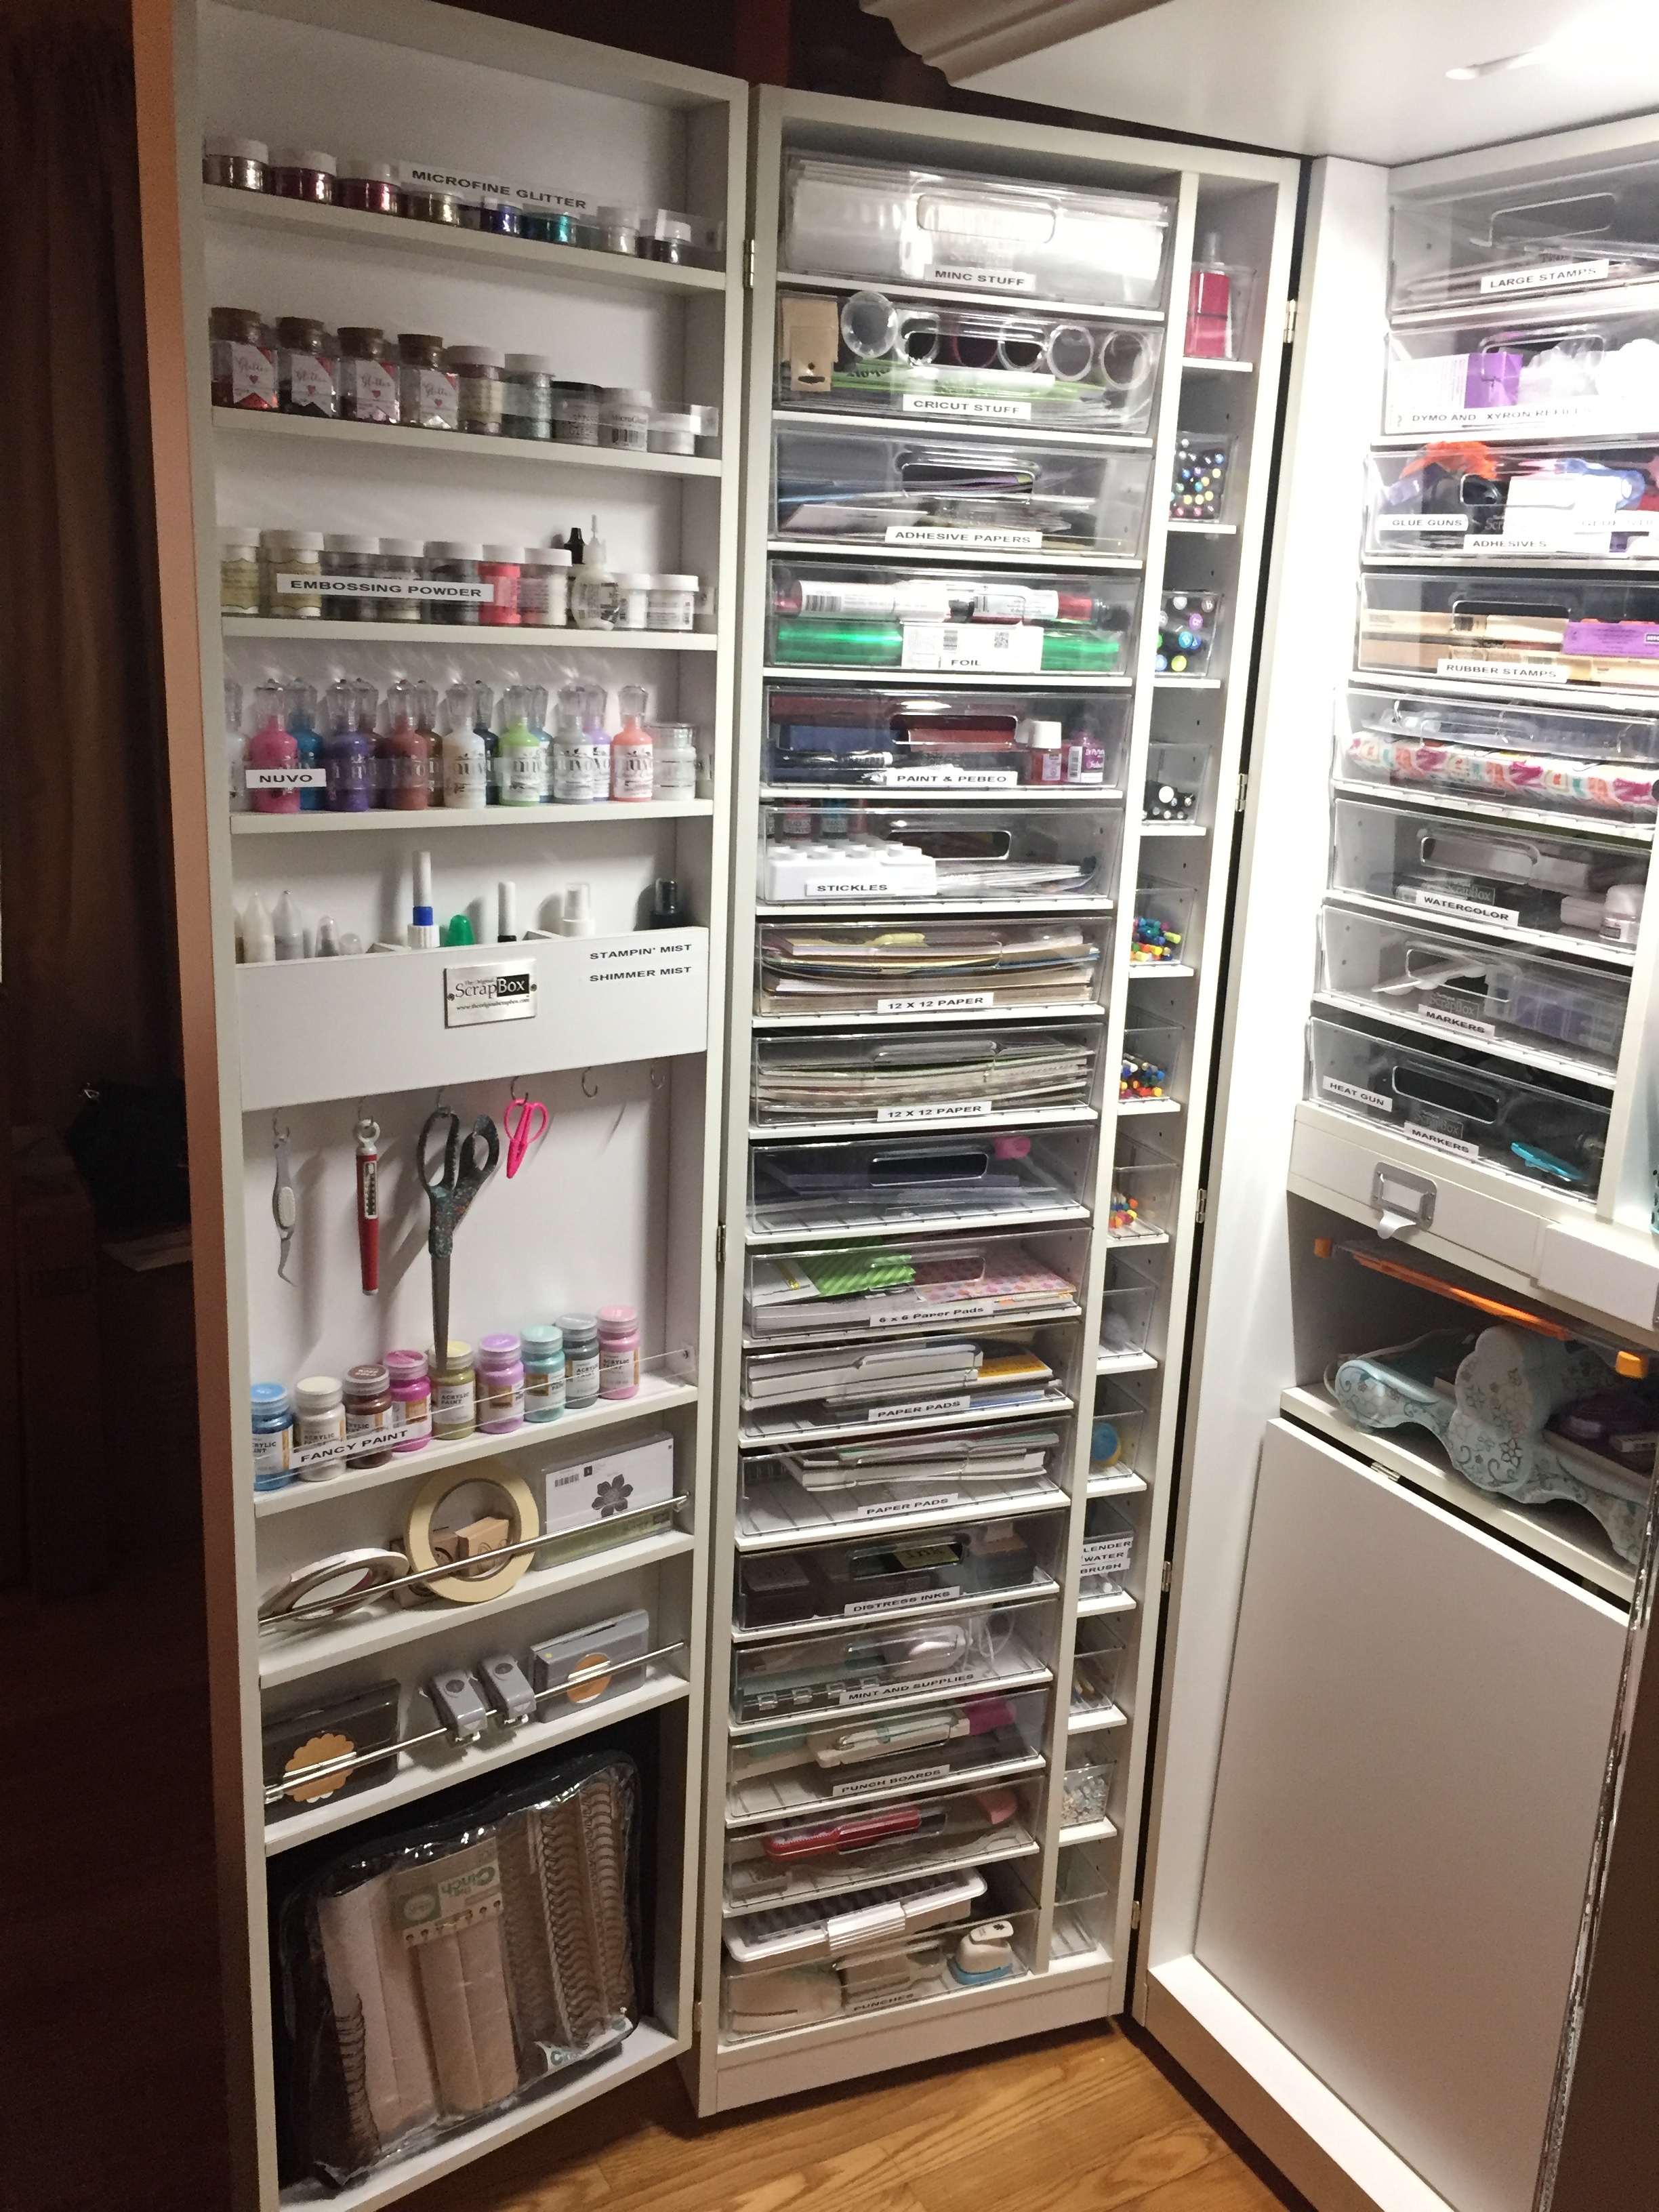
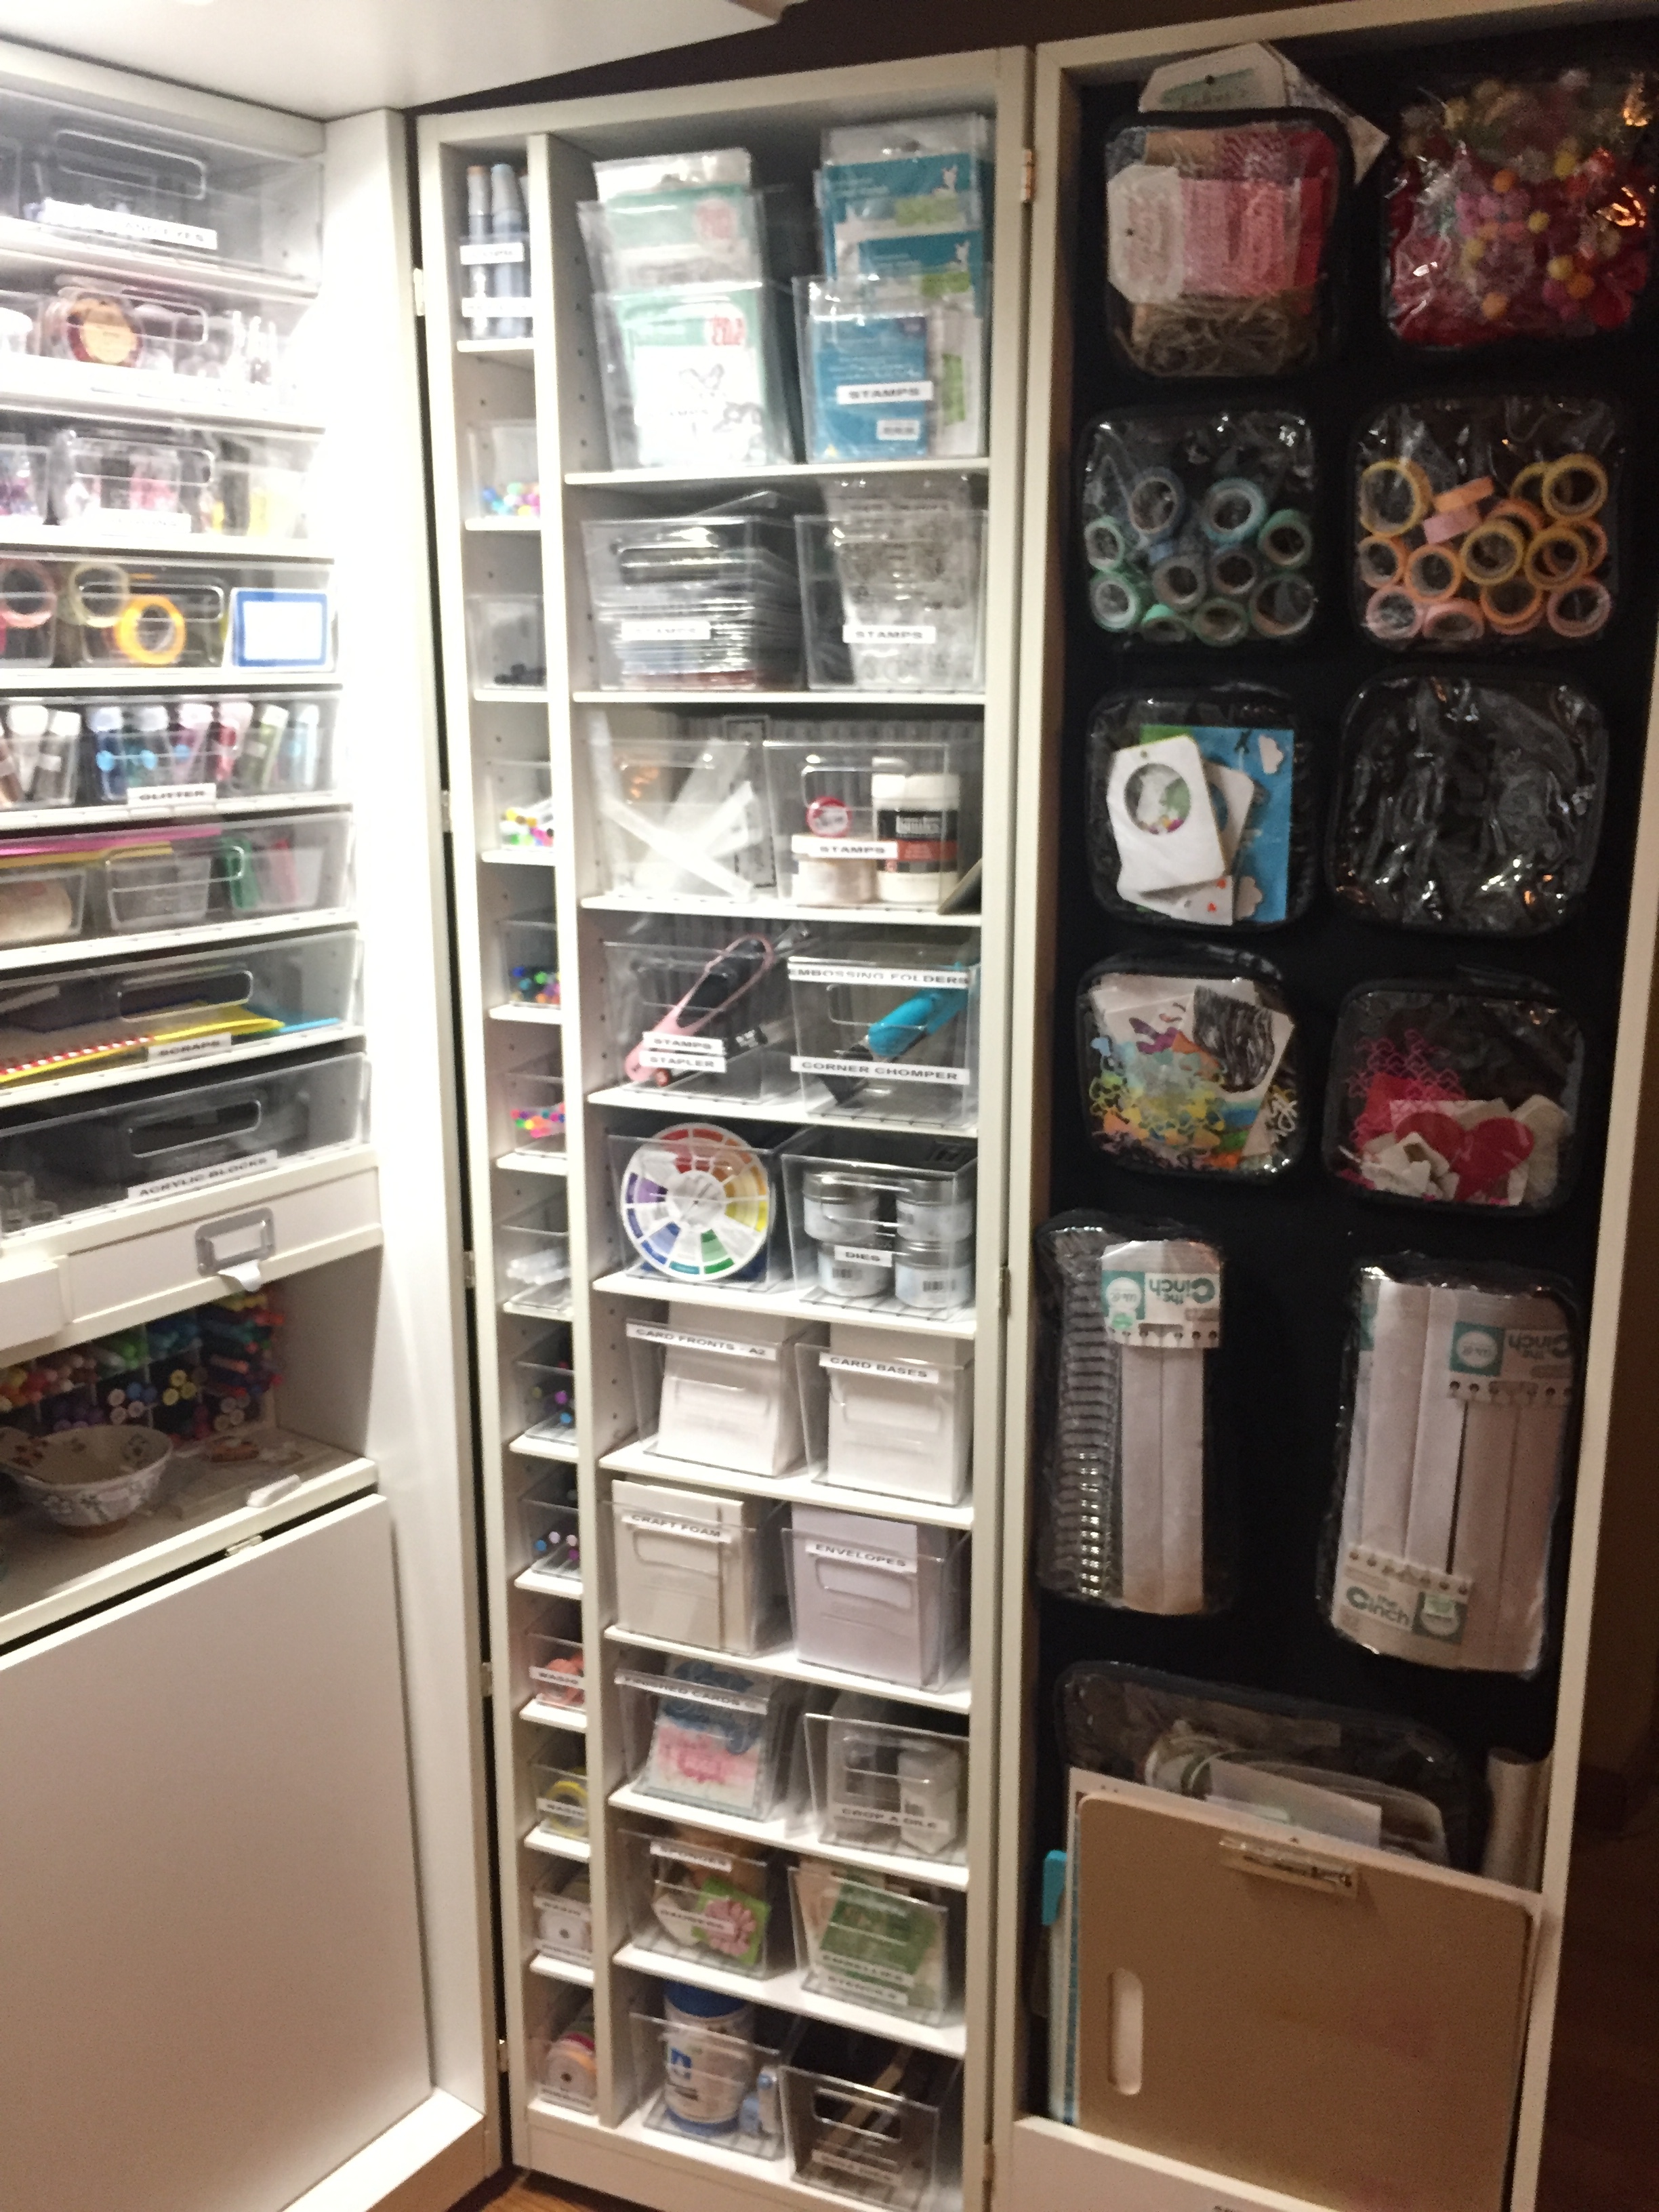
Friends...I finally got a Workbox!!! It started as me showing the video to my hubby and he said "You should just get it." 24 hours later my pre-order was complete. It arrived about two weeks ago  and honestly, I have been working on it since then. I built it over the course of a few evenings and I just finished putting all of my items into it this past weekend.  I will do another post soon that gives a full look at it, but this post is just about the build and my first impression. To be frank, this is not a single person job, I repeat, find someone to help you! I am an experienced engineer and by the time I was done, I had used several principles of leverage, power tools, and light woodworking; it was a monster. However, once it was finished, it was magnificent! I was able to fit so many supplies in it because of all of the tote storage. Check out some photos below. 

IMG_6784.JPG

These boxes are in addition to a crate that was about 7' x 3' that I had to leave in my garage. 


IMG_6790.JPG

This is all of the hardware that comes with the Workbox. 


IMG_6791.JPG

These tools are included, if you have a decent rubber mallet, use that instead, I found that the head kept popping off of this one. 


IMG_6792.JPG

End of Day 1. 


IMG_6797.JPG

End of day 2. 


IMG_6800.JPG

End of day 3. Putting the shelves in was surprisingly difficult because some of the spacing was really tight. 


As you can see, I started putting things in there right away, and this was when it started to get really fun and exciting. This was also before I installed the crown, which I love, the light is great.

As you can see, I started putting things in there right away, and this was when it started to get really fun and exciting. This was also before I installed the crown, which I love, the light is great.

IMG_6870.JPG

I ordered the magnetic boards for both doors because I have a ton of dies that I wanted to store and this worked beautifully.  Also I ordered the shelf upgrade for the Velcro swing door, but I haven't installed it yet, I'm still debating if I will.

Left side. 

Left side. 

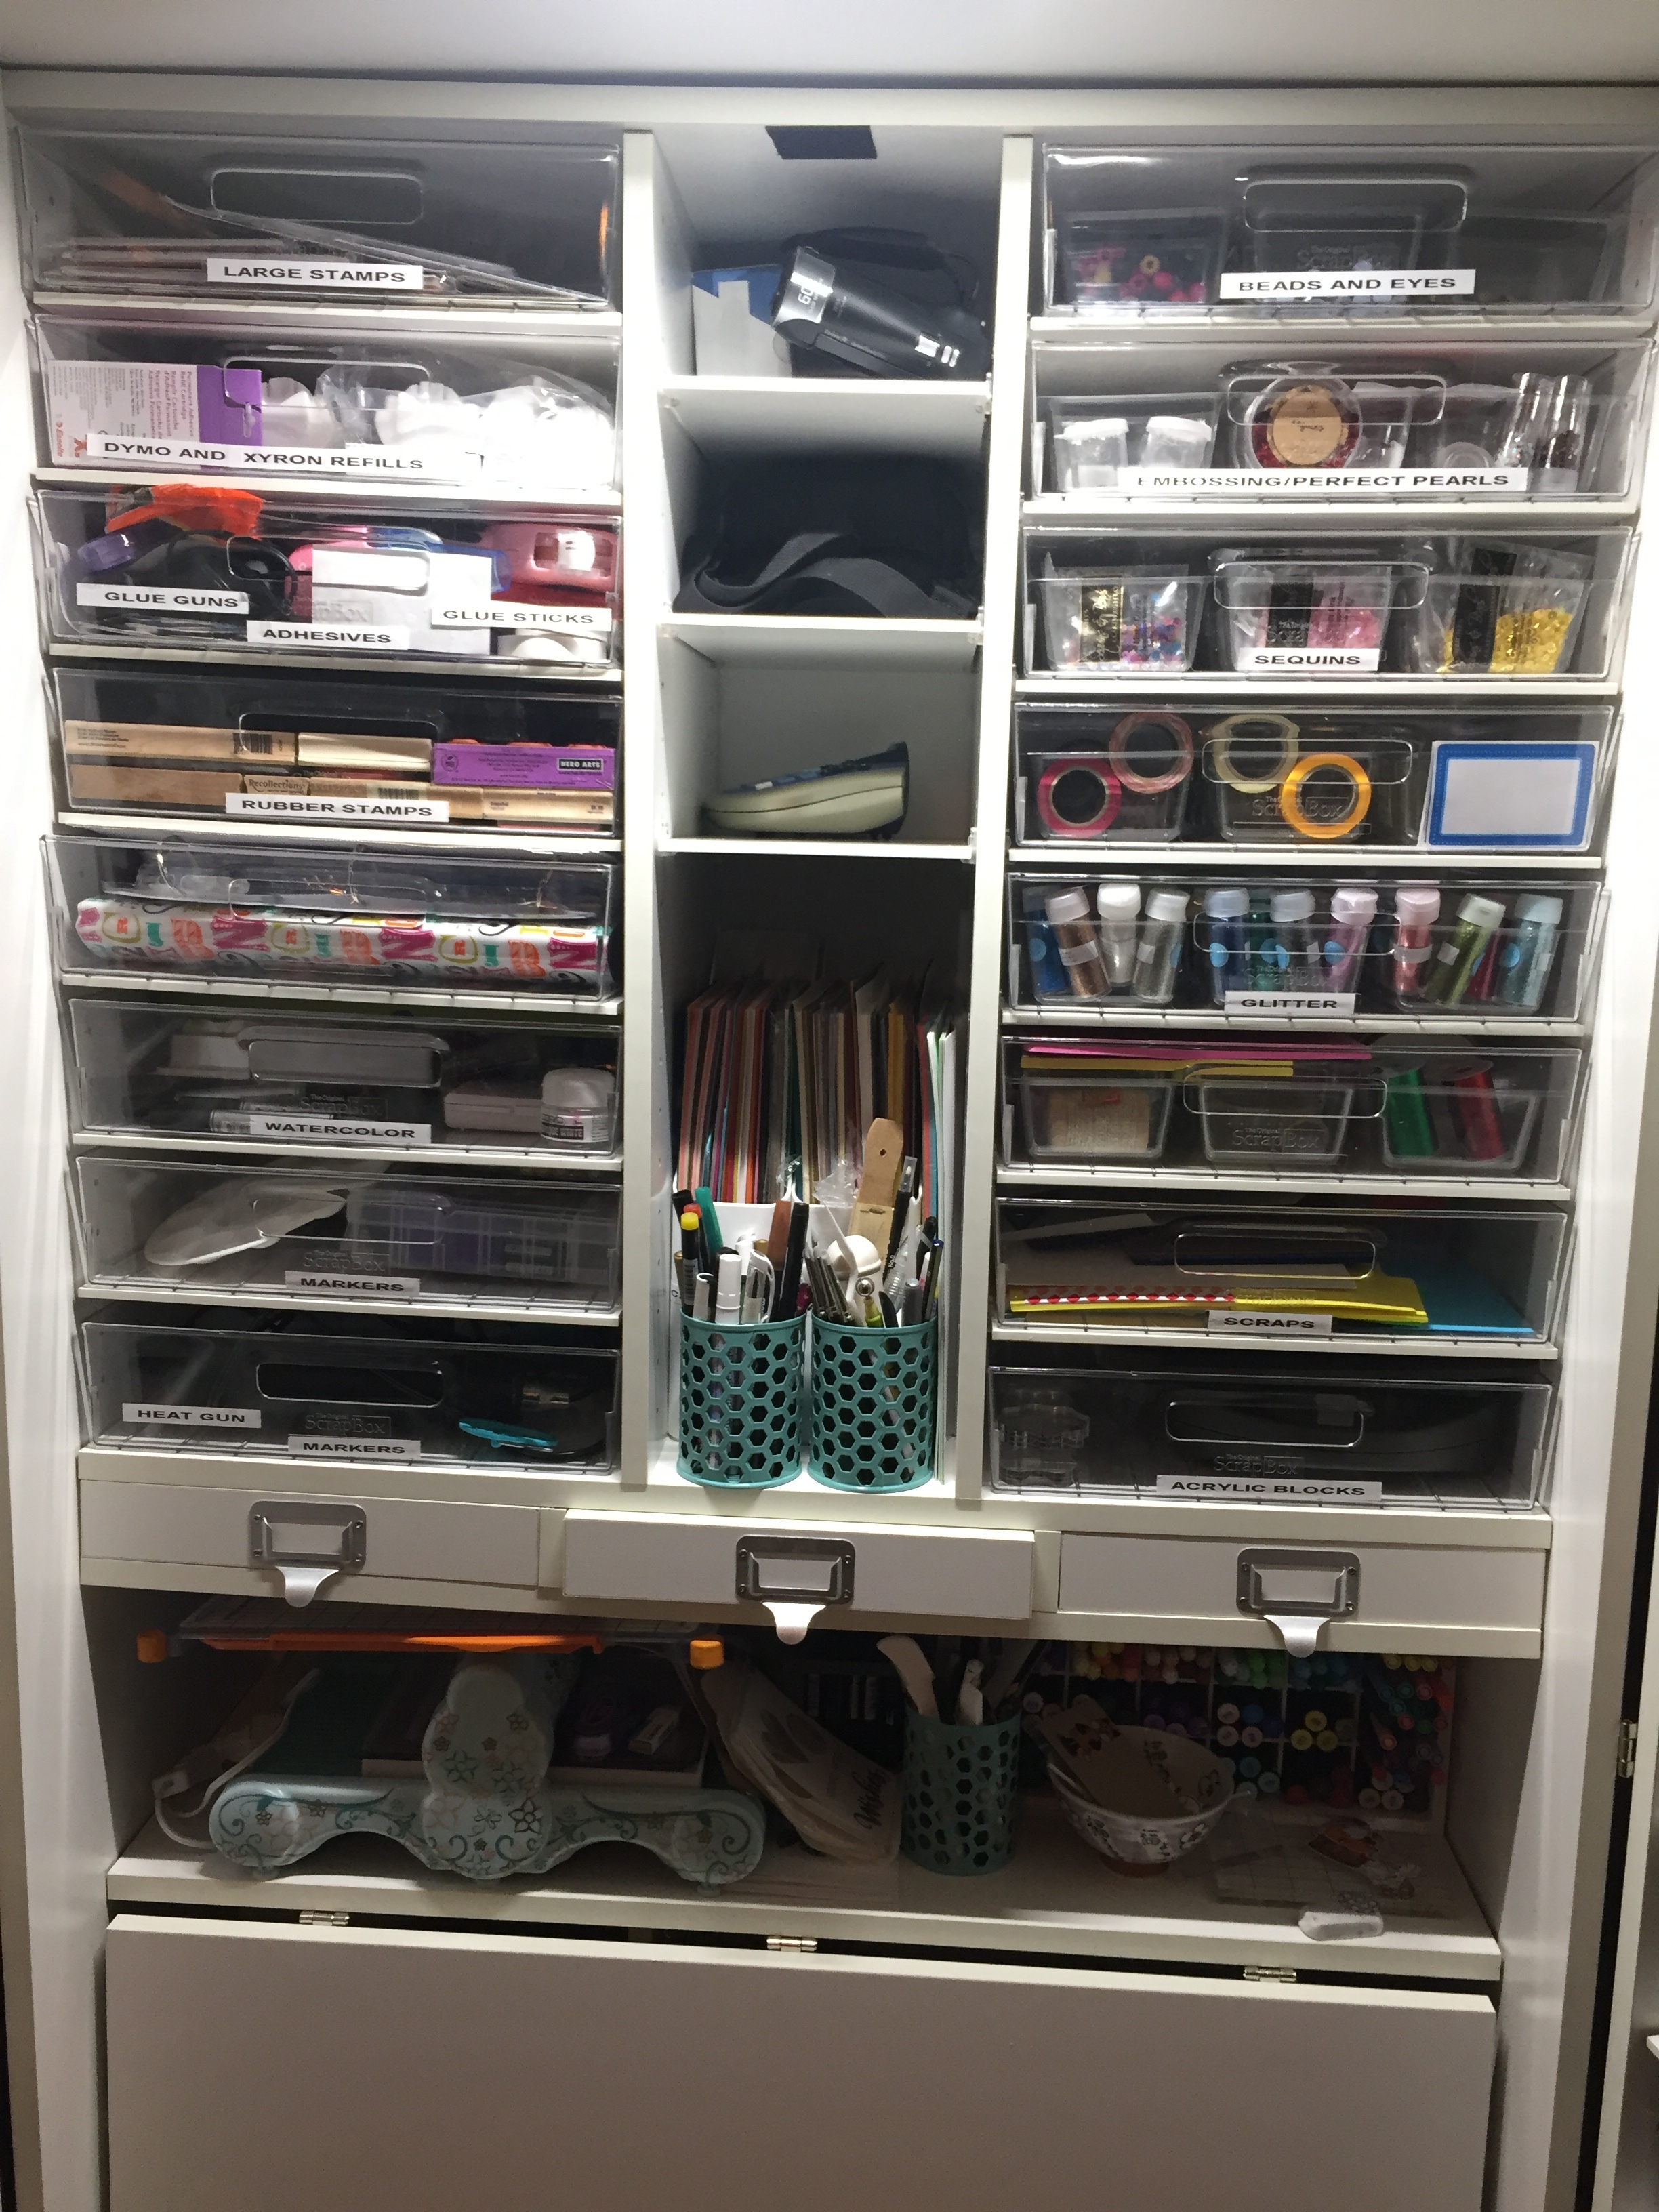
I used my Letratag to put labels on almost all of the totes/shelves because as I was organizing, I realized everything would be in a new place.  That part was super fun too, I went through 3 cartridges! 

IMG_6874.JPG

I found so many things I had forgotten about and apparently at some point I needed to buy every roll of washi tape known to man, I found at least 30 rolls. I also found duplicates of a few items and this made me realize I will probably spend less on supplies now because I can see everything that I own. I think that is awesome because in just the few weeks that I have had this, I have been able to make more cards and drawings because I'm not wasting g time looking for supplies or trying to find a clean work space. 


My camera even mounts to the top shelf! 

My camera even mounts to the top shelf! 

I am so happy with this view; so many of my frequently used supplies are right in front of me. I am still working on organizing a few things as I use it more. In fact, my paper trimmer now has a designated space instead of sitting on top of my Big Shot. 

IMG_6848.JPG

It is so easy now to sit down and color or stamp, record tutorials, or work on blogging. This was a big expense, but it was really an investment that I think is worth it just for the time and sanity saved.  If you are on the fence about it I can honestly say I am very pleased with this piece and it looks beautiful closed.  I did not show under the table, but my sewing/embroidery machine is under there along with my colored pencils, my Crop-a-Dile Big Bite, my Cinch, my Xyron Creative Stations, and my Fiskars Rotary Cutter, and they all fit comfortably. I am still impressed by how much it actually holds, I was able to put all of my regularly used supplies in there and free up so much space in my closet in the craft room. 

Now that I have completed that, expect regular posts and videos! I have recorded a few but I have to edit them, also I will be doing a full tour of my Workbox soon. As always, thanks for stopping by and happy crafting!